Board Layout Editor offers complete customization of Yodiz boards including Issue Tracker, Release, Kanban and Scrum Board. Features of Board Layout Editor range not only adding and mapping different status settings but also capability to add new panels to the board.
Note: Board Layout permission is handled at individual user level. “Customize Cards & Panels” option on a board right navigation menu is only available to a user, if Global Permissions > “Board Configuration” rights are enabled.
1. Working with Item Workflow
Board layout settings depend on your Workflow scheme. Multiple projects can use identical Board Layouts under same Workflow scheme. You can still customise a board layout as soon you realize its need.
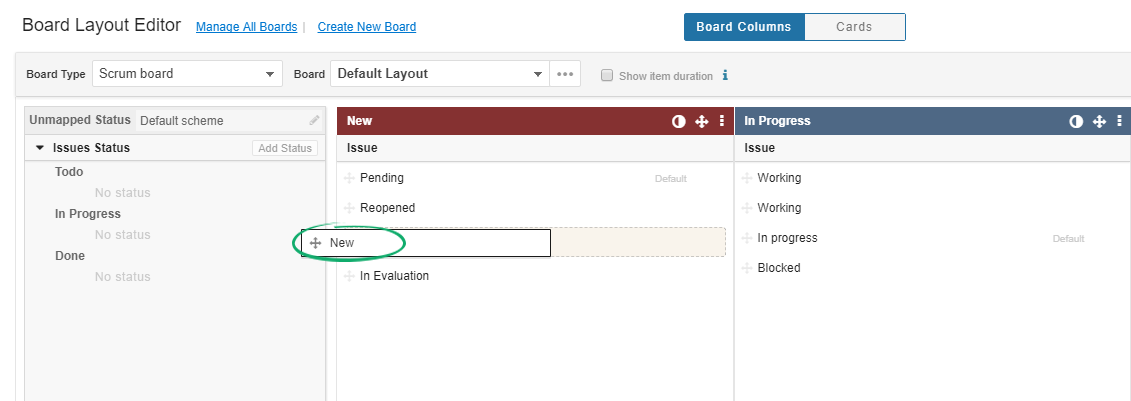
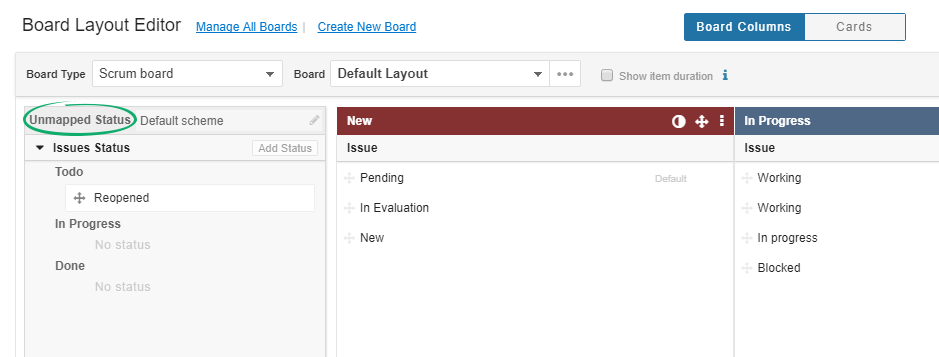
Board Layout can be customized and give freedom to add a new status, map multiple statuses under one panel or even move status to another panel. To configure a status to a panel, drag and drop the status from Unmapped status to that panel.
Note: Changing your board layout will still follow same Workflow scheme.
1.1 Add New Status
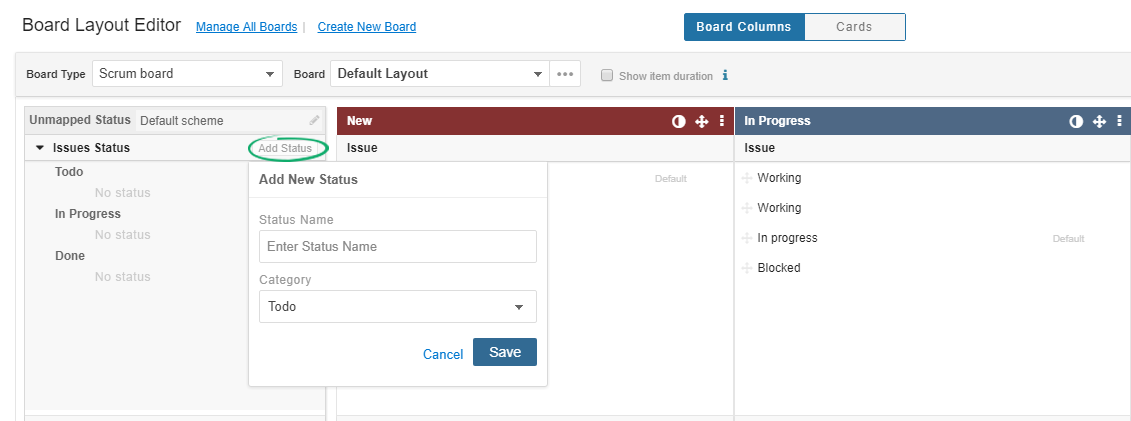
You can add new status in your item Workflow scheme and set its status category at the same time. Adding a status in board will ultimately add the status in your Workflow scheme.
Note: Only Super Admin can add a new status. Status is added in Workflow scheme and impacts all projects that are using the scheme.
Once you add the Status in one of the categories of Unmapped Status. Drag it to the desired panel for status mapping and save the changes. Go back to actual Board and click on the respective Board column header to see a new status is also listed there. Refresh browser page, if changes are not visible yet.
Other boards using same the Workflow scheme will have the newly added status under Unmapped Status panel until you edit their board.
1.2 Set Default Status Per Panel
You can set a status as default for your board panel, it applies only when you drop an item on a different panel. This default setting is different than a Workflow default status setting that is defined per status category. To make a Default Status per Panel, click on Default link available against each status, if you hover upon the status in a Layout Editor panel. Only one status can be the default status for Drop Action in one panel. “Default” is mentioned besides the default status to distinguish it from other statuses.
On the Board, when you are about to drop an item card to status section of a panel, all mapped statuses are shown to the user for quickly setting the status of the item card at the same time.
If you do not drop an item card on a specific status of the board column, item status will set to default status of the column.
1.3 Edit or Delete a Status
To edit or delete an existing status from item Workflow, you need Super Admin rights. This is to prevent mistakes as a change in status will impact existing project items and all those projects which are using same Workflow scheme.
2. Add New Panel
You can add the new panel of your choice in your desired board. Maximum number of columns per board is 10. Just go to the Board Layout Editor of the respective board and click on Add New Panel.
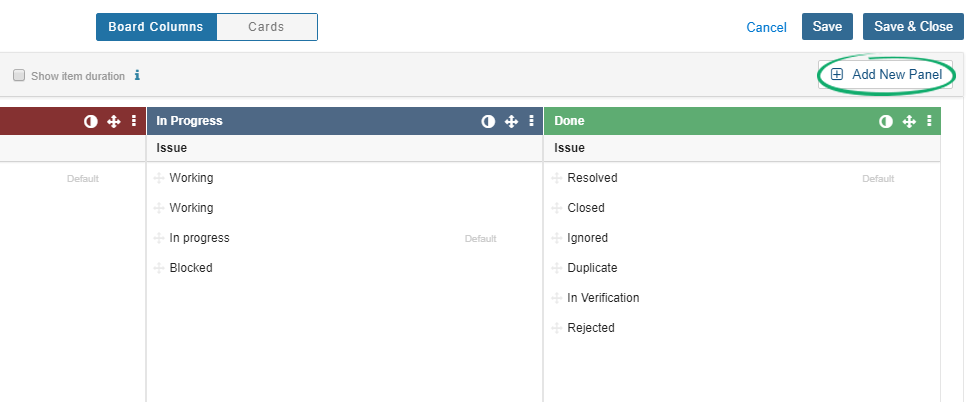
You can also assign statuses to this panel or simply add new status within the defined categories and drag the Status from Unmapped Column into the newly created panel. Panel is appeared as Column in the board.
For example, if you mapped “In Testing” status under this new panel, and go back to board. Changing an item status to “In Testing”, will automatically move item card to this New Panel on Board.
2.1 Rename a Panel
To rename a Panel name, click on its name, make changes and click on green icon to save new name. You can also rename the Panels by clicking on context menu, at top of panel.
2.2 Reorder Column Position
To reorder a panel position, simply click and hold on Reorder panel icon and drag it to the new position on layout editor.
2.3 Delete a Panel
Deleting a panel from a board will vanish it from the board and all underlying status will be placed under Unmapped Status column on left most side of Board Layout Editor. You can delete a Panel by clicking on its context menu, at top of the panel.
2.4 Set Panel Color
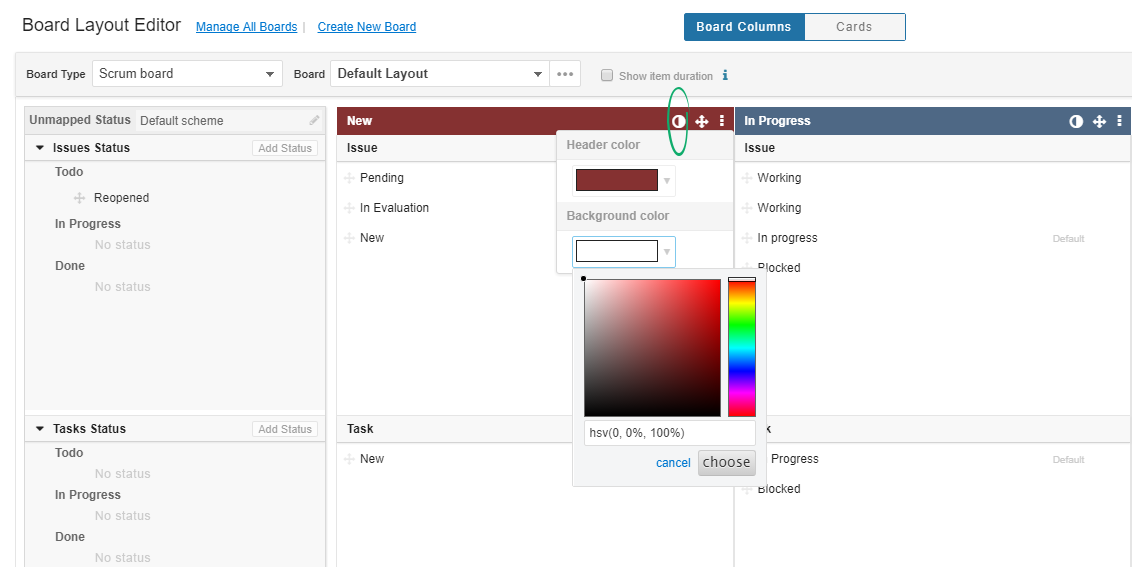
To personalize your board, you can change colors of the board Panels as well. You can set panel Header color and Background color separately. Click on Color icon at panel header to set the color of the panel on the board.
Once you choose the color you desire, click on Save and the chosen color will be assigned to that Board panel.
3. Hide unmapped Status and Column
Every newly created status is added into the Unmapped panel of Layout Editor. Unmapped panel only appears on the Board when you have a status under Unmapped Status panel of board Layout Editor. The Unmapped panel contains a list of Statuses, which are not mapped in any panel. Clicking on the board Unmapped panel header will open a list of all the unmapped statuses.
Note: You can enable “Show item duration” checkbox to view how long Item has been in the respective panel and status, it is shown by an hourglassicon on Item card.
4. Configure Item Card
An Item Card fields and color can be customized for each board.
4.1 Item Card Colour
You can define item card color per item status.
Clicking on “color” icon against a Status would open a panel of pre-selected set of colors, assign any color to the status you like. Whenever item status is mapped to the defined status, Item Card background color on the board will be changed. Learn more to set Item Card color.
4.2 Item Card Fields
If you feel that your board is crowded with information and want to see only the selected information on board. Decide with your team which fields are important and bring value for their daily use of item card. You can configure item card fields per Item type. Item Card fields are also configurable at board level. Hidden information is still accessible through item details view.
The mandatory fields are Item ID, and Title only. You can also add custom fields in an item card. All custom field types are supported except richtext editor.
Fields like Priority, Due Date and Responsible are shown by default. Click on Cards tab of Board Layout Editor to customise item card.
5. Rename a Board
Users who have access to board layout editor can also change name of the board. Changing a board name in one board editor will show new name in all projects, that are using it. To rename a board:
- Click on contextual menu of Board field, and select Rename
- Write new name of the board and save it
6. Archive/Delete a Board
If a board is not in use anymore, you can delete or archive such board. Archived board configurations are saved and it is not shown in available board list while a deleted board will be removed completely.
Note: You cannot delete a board until it is used by any project board.
To delete a board, first make sure that it is not used by any project. Follow the steps to delete:
- Open editable board and go to its board layout editor by following the navigation below:
- Click on “Manage All Boards” link mentioned at top left of editor
- Locate your board name and click on its contextual menu options
- Select Archive or Delete. This will delete the board if its configurations are not used by any board
7. Access Board Layout Editor
In order to access Board Layout Editor, open the respective board and follow the navigation:
Note: Changes made in Board layout will not apply on your board itself. These changes are only saved on the board layout. To change the layout of your board.
Go to Right Navigation Panel > Settings > Switch Board Layout > Edit Pencil icon > Select your desired layout > Apply