How it Works
The whole workflow of this integration is based on Triggers (when this happens) and Actions (then do this) in Zapier.Yodiz Trigger to Jira Action
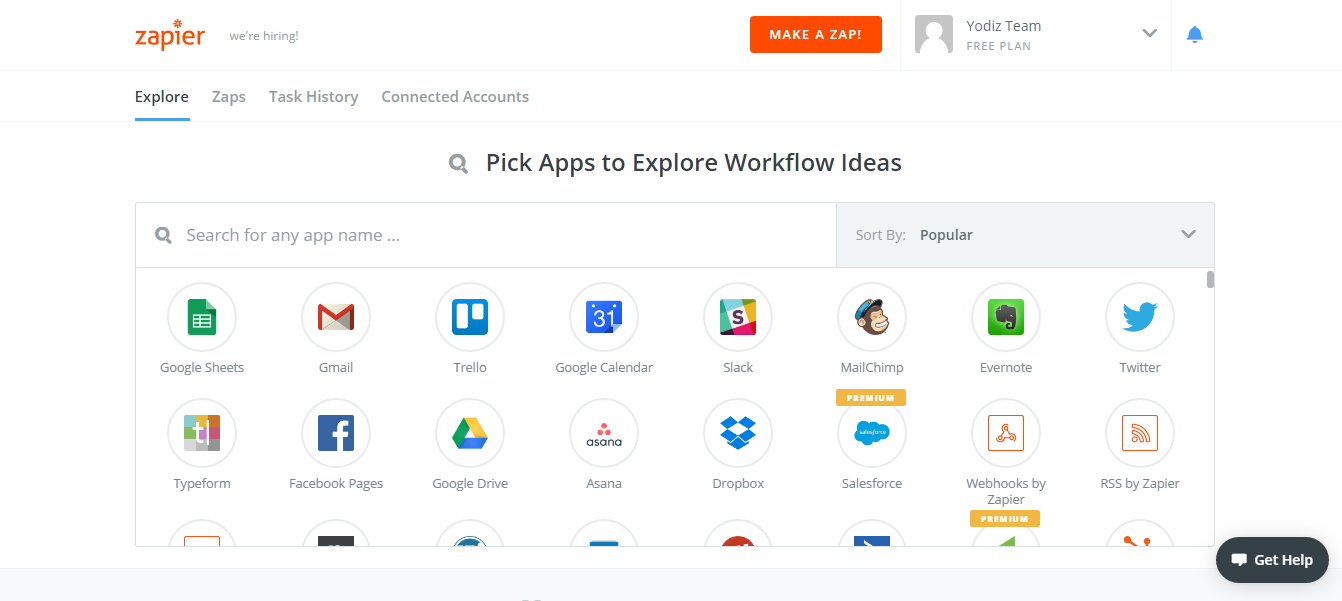
Step 1: Make A Zap
Login to your Zapier account and click on “Make A Zap”.
Step 2: Choose Trigger App
Choose Yodiz application as a Trigger.

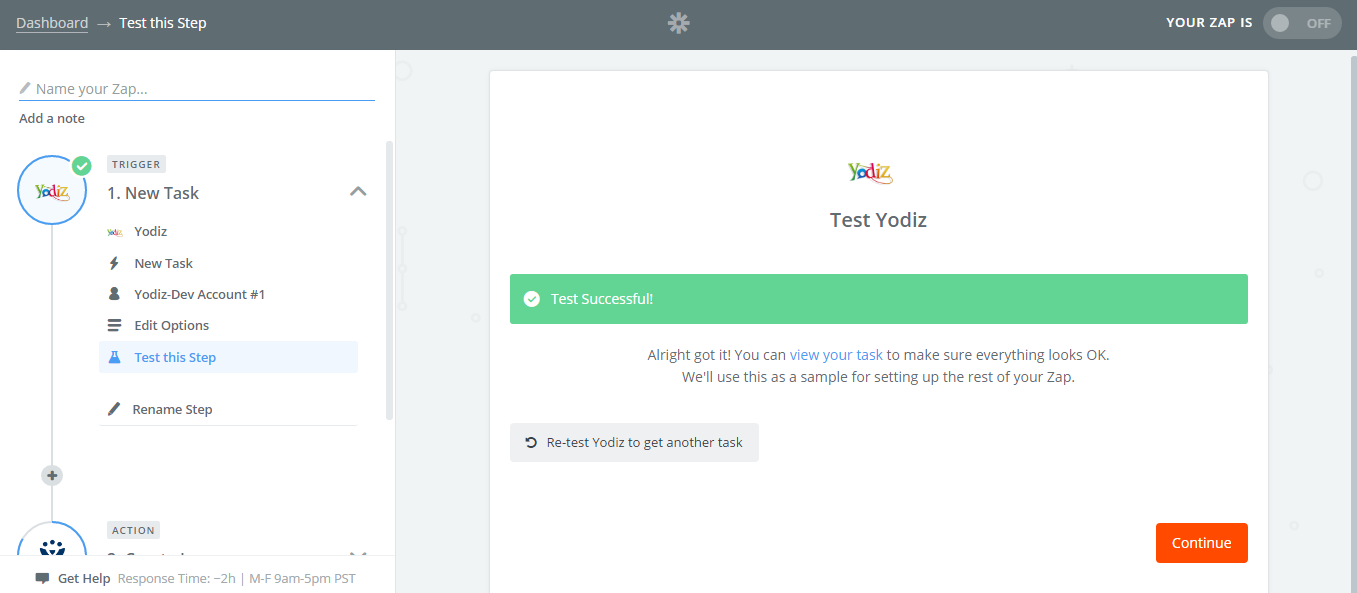
Step 3: Choose Trigger
Select what will cause the Trigger. Follow the screenshot below:
 In this case, we have selected New Task. Click on Save + Continue.
Step 4: Connect to Yodiz Account
Connect to your Yodiz account.
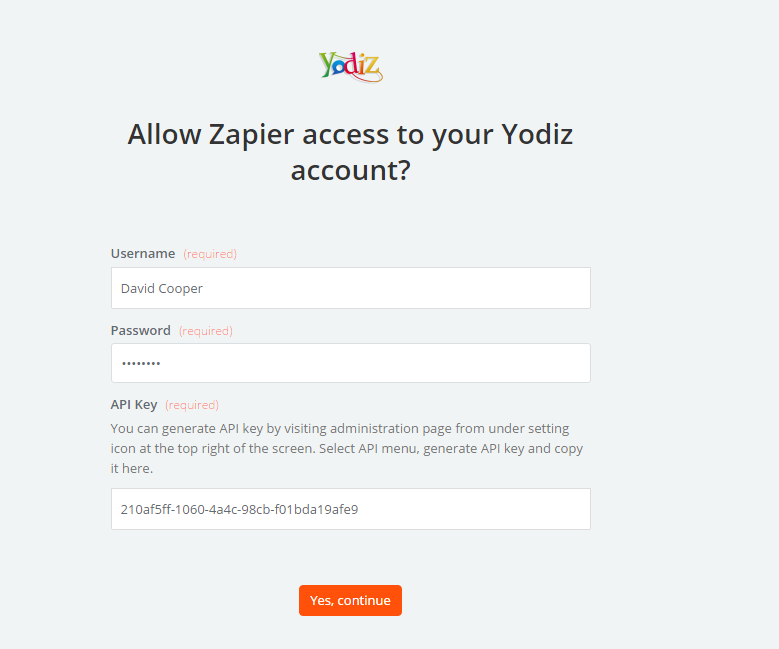 Username: Yodiz account username.
Password: Password associated with Yodiz account.
API Key: Provide API key. If you can not find API key, follow this link: How to Generate Yodiz API Key
Username: Yodiz account username.
Password: Password associated with Yodiz account.
API Key: Provide API key. If you can not find API key, follow this link: How to Generate Yodiz API Key
Step 5: Select the Project
Select the Project for which you want to create a Task whenever a Trigger is pulled. creating a Task will perform a Trigger.
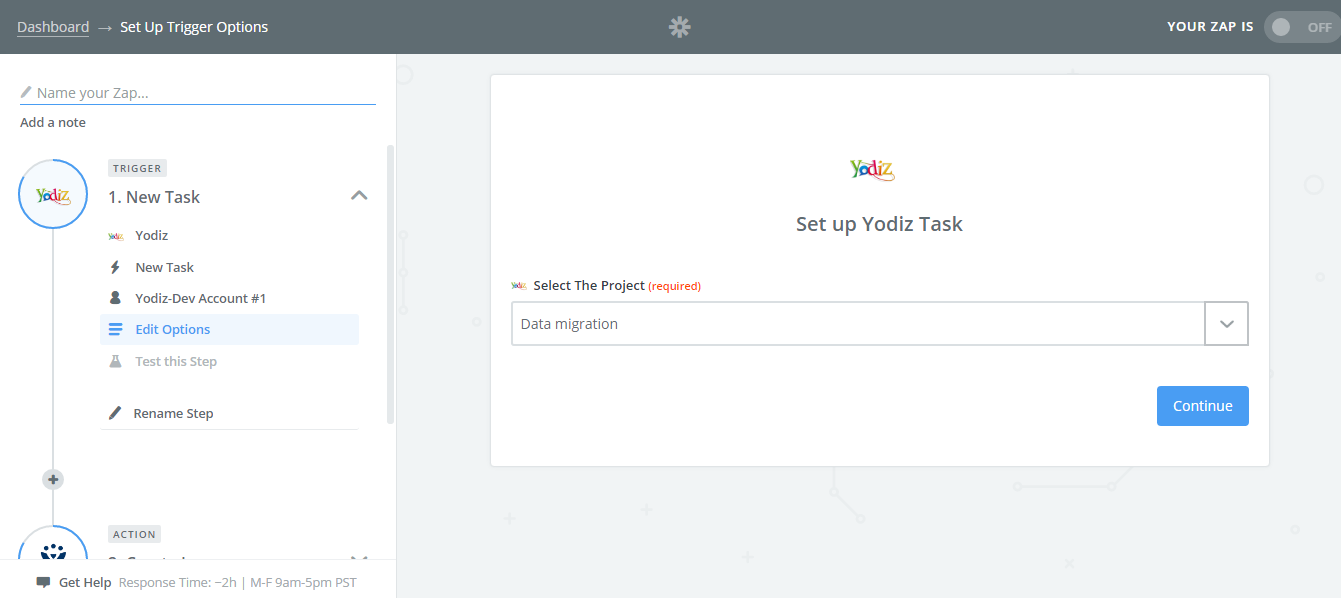
Click on Continue, following page will appear.
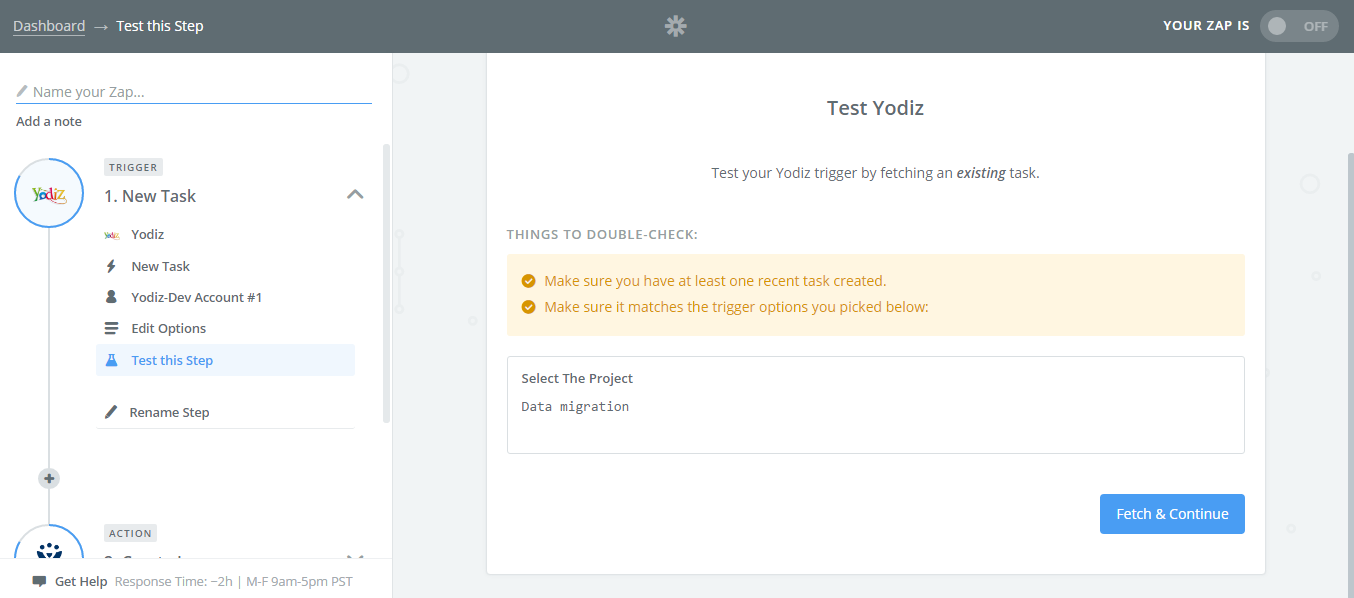 Double check your details and click on Fetch & Continue.
Following page will appear.
 Click on Continue.
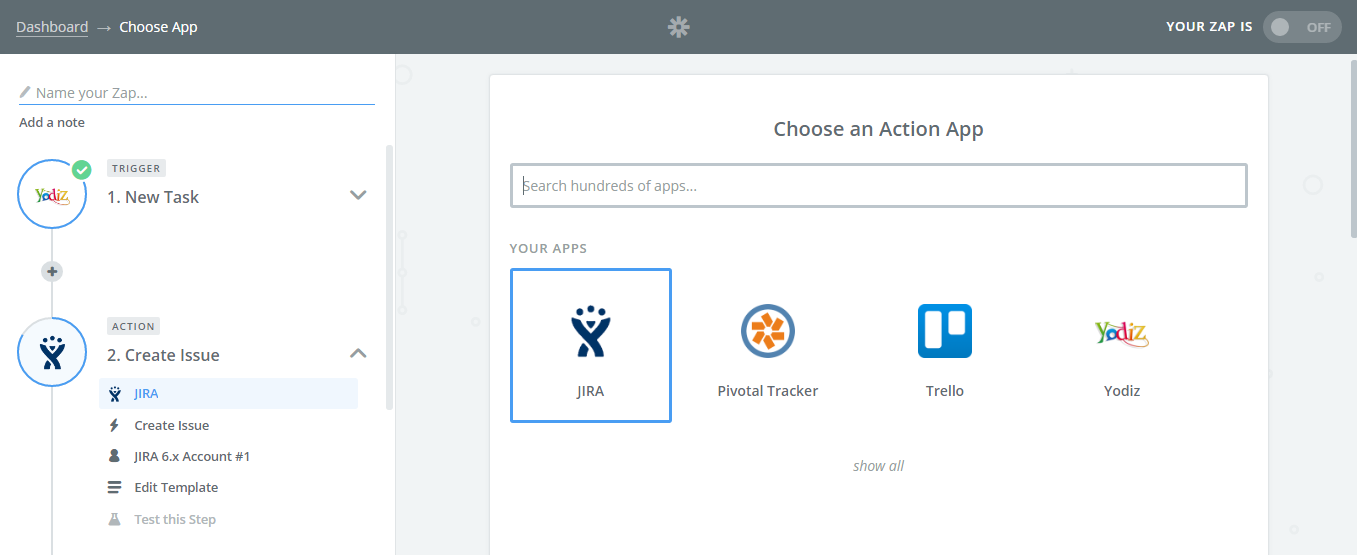
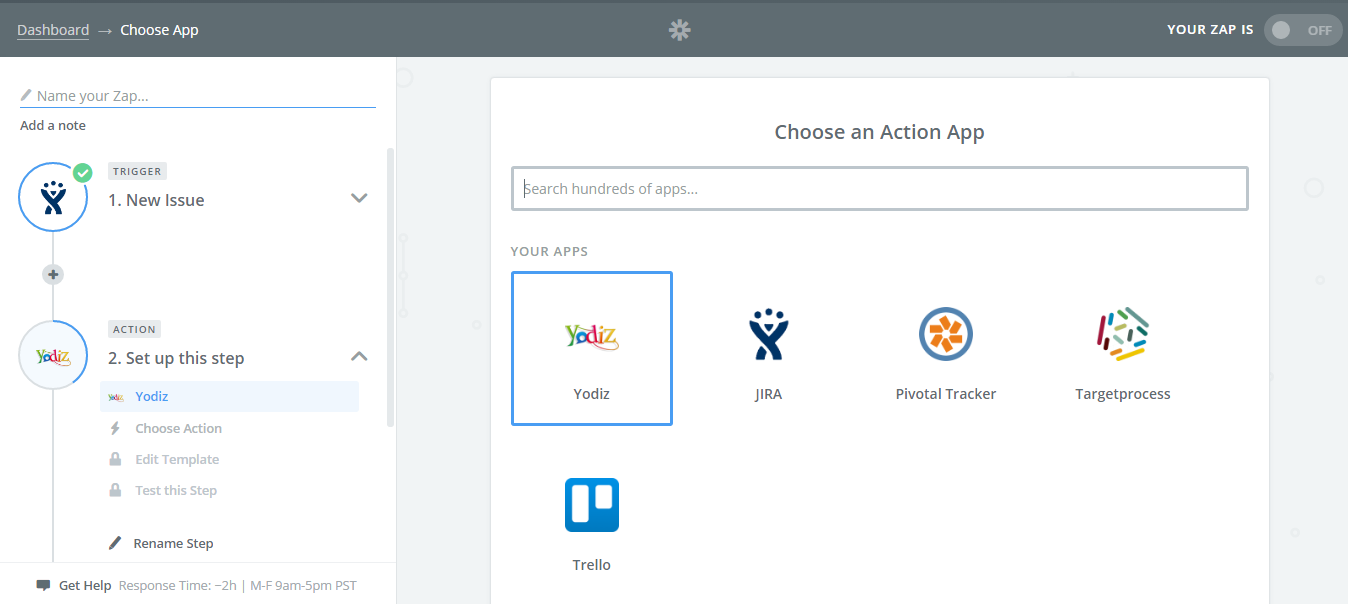
Step 6: Choose an Action App
Choose Action app.Click on Continue button, given at the end of current page.
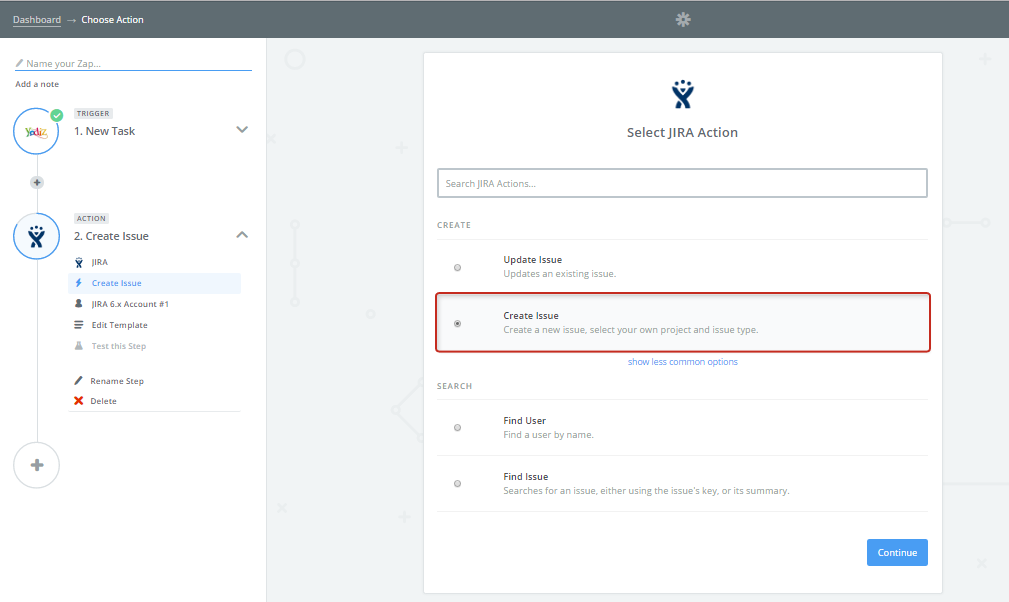
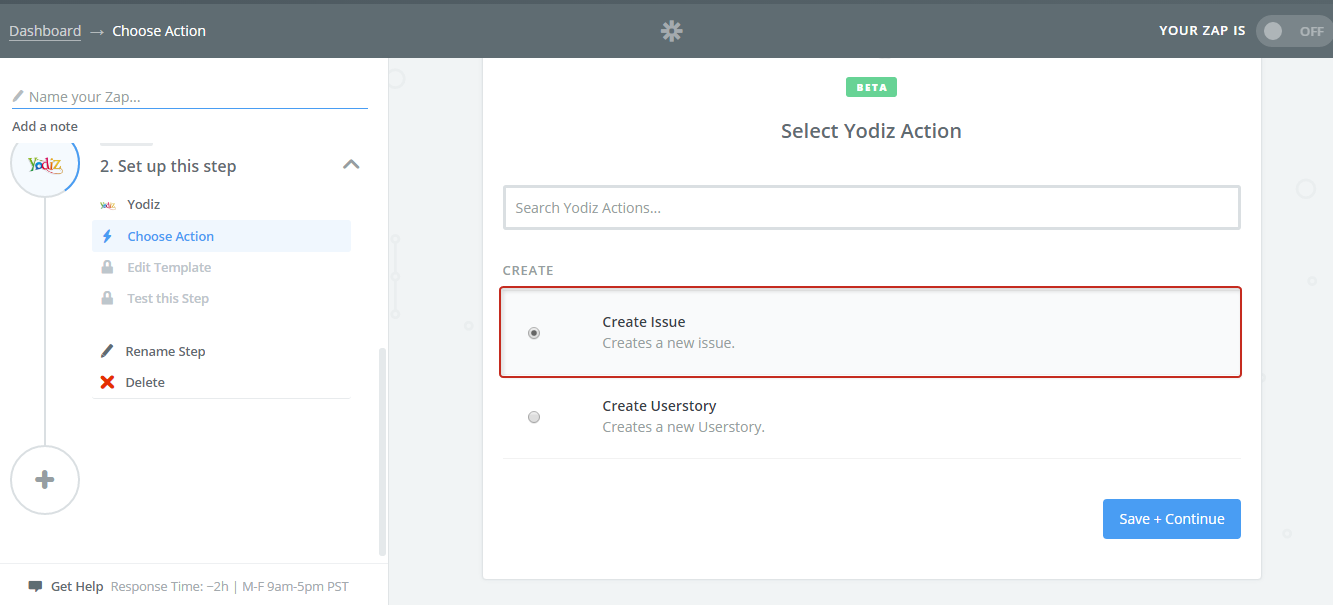
Step 7: Choose Action
We have selected Create Issue in this case. Click on Continue.
Step 8: Connect to 3rd party application Account
Configure new Jira account in order to continue.
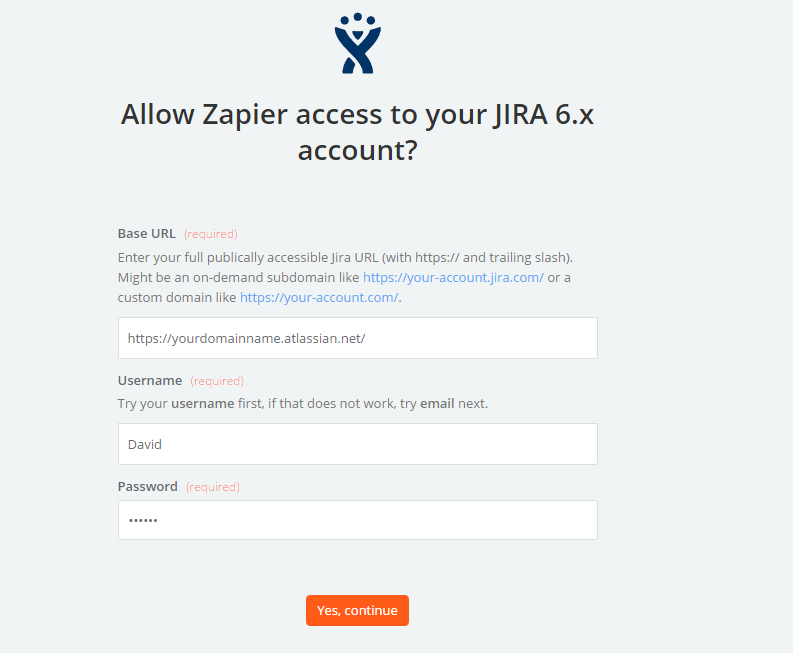 Base URL: URL for Jira account.
Username: Username associated with Jira account.
Password: Password for your Jira account.
Click on Yes, Continue.
Base URL: URL for Jira account.
Username: Username associated with Jira account.
Password: Password for your Jira account.
Click on Yes, Continue.
Step 9: Setup Jira Issue
Fill in the fields, Required fields are mandatory while optional fields can be left blank, depending upon your requirements.

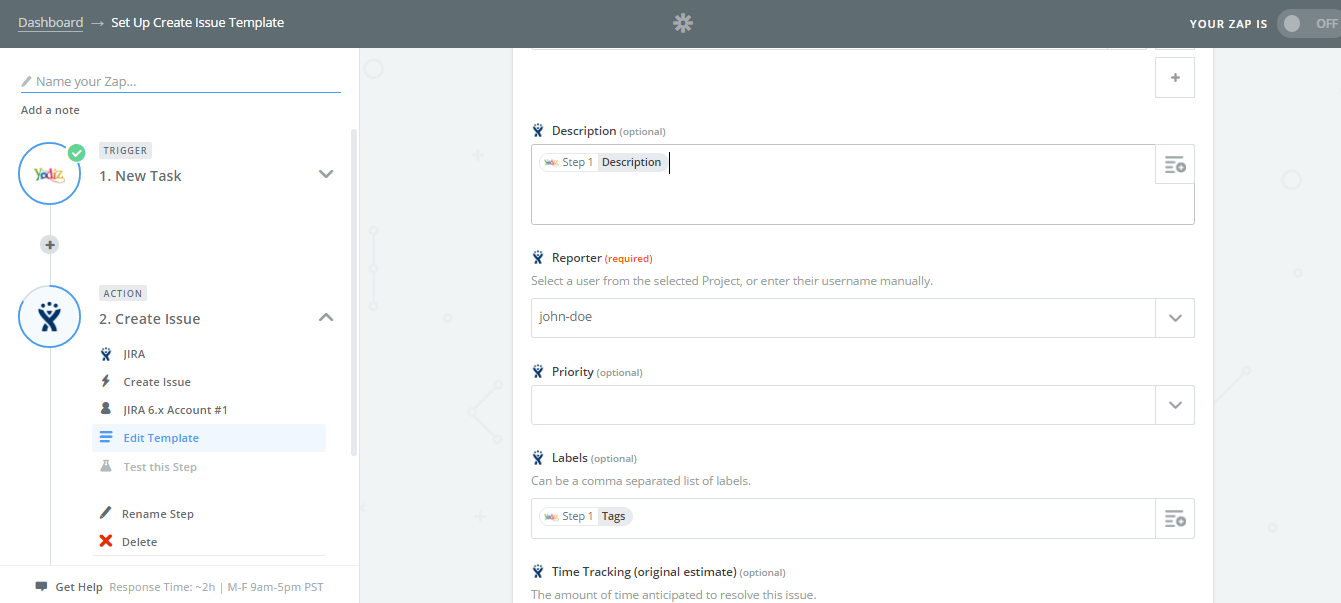
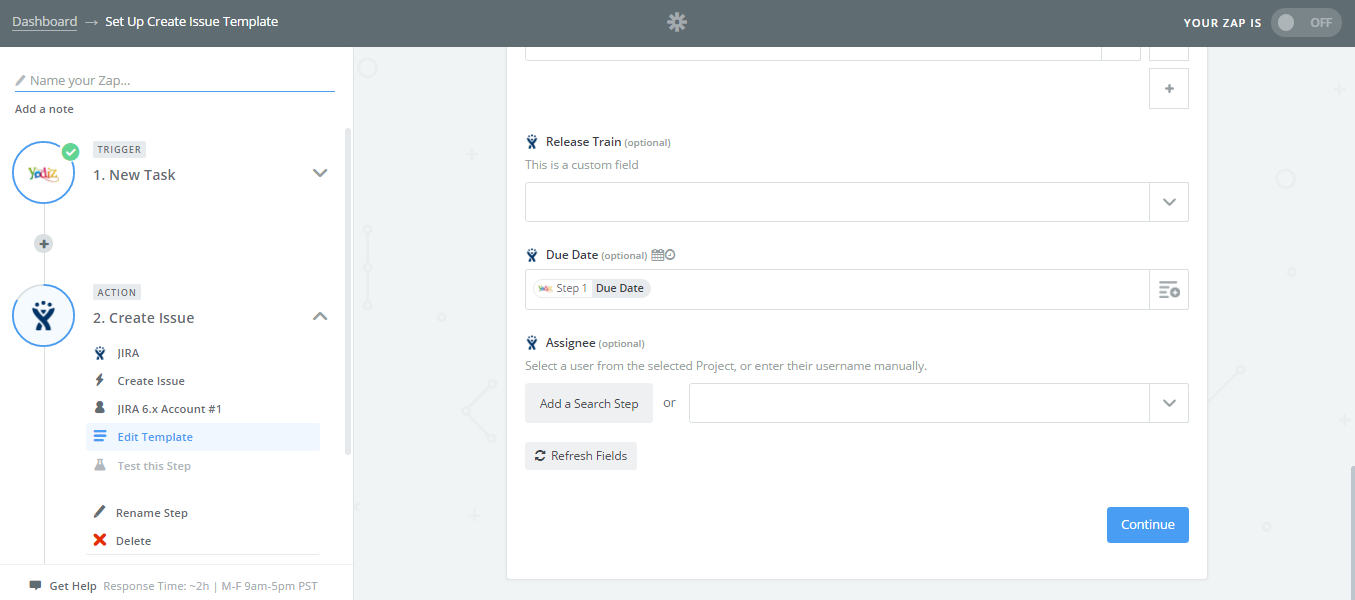
Once you have filled in all the details, click on Continue.
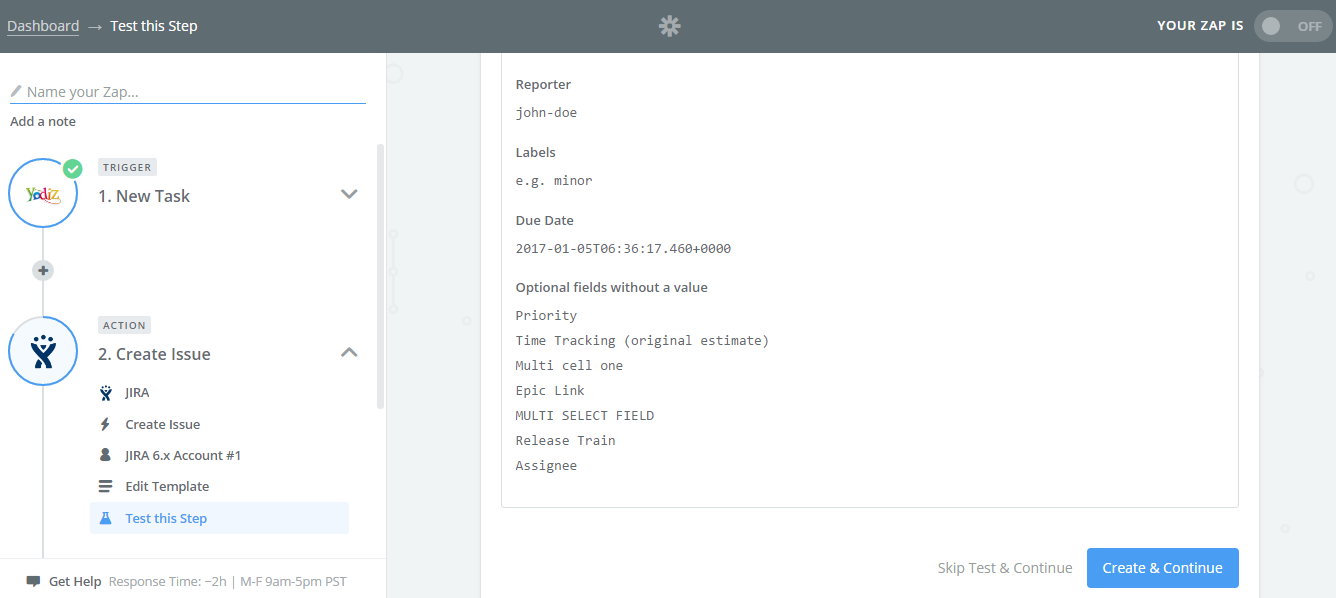
Verify your selections and click on Create & Continue.
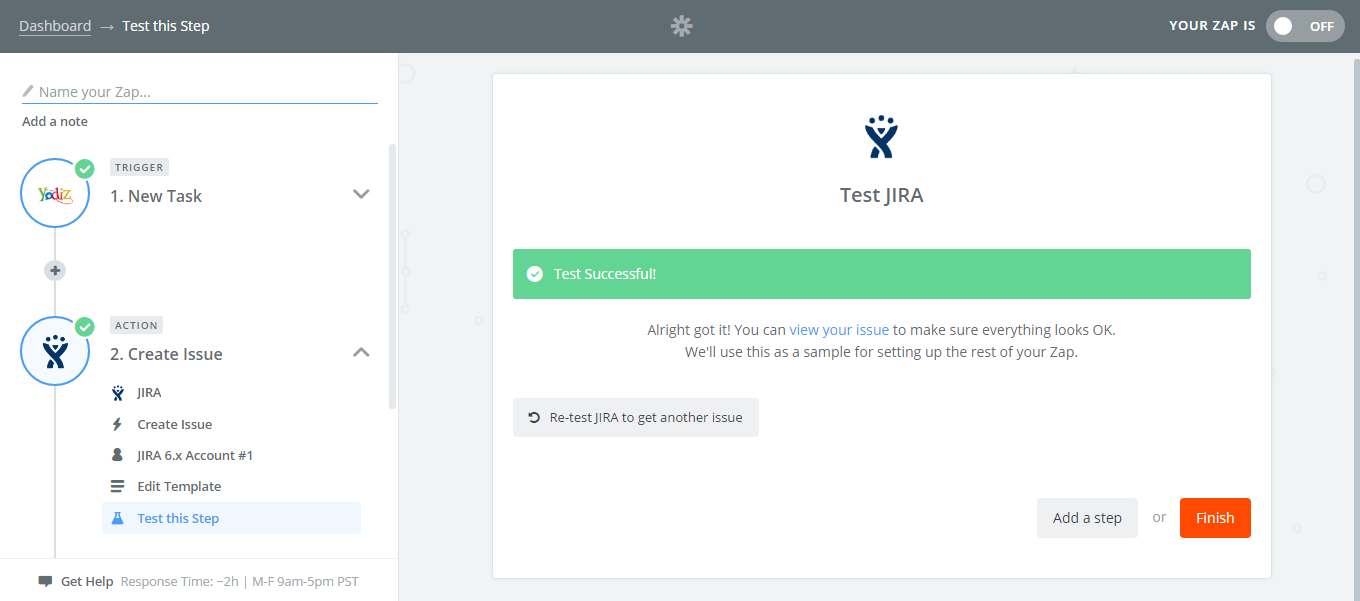
Click on Finish.
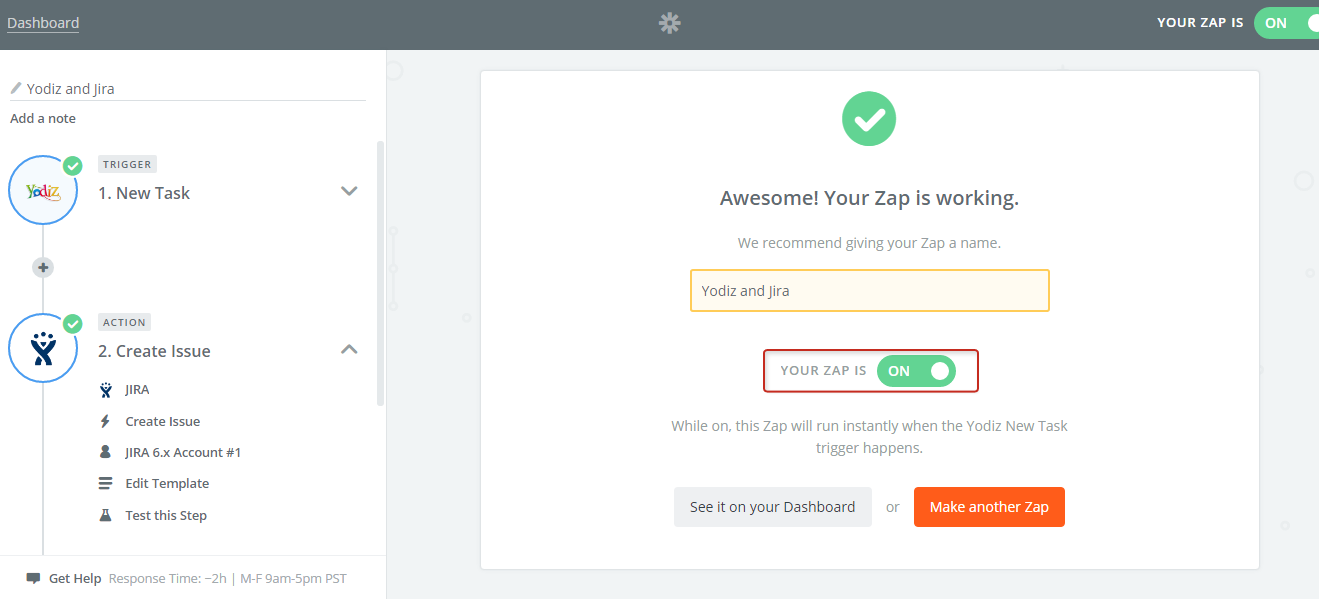
Turning ON your Zap will complete workflow and you can find this Zap on Zapier dashboard.
Jira Trigger to Yodiz Action
Step 1: Make A Zap
Login to your Zapier account and click on “Make A Zap”.
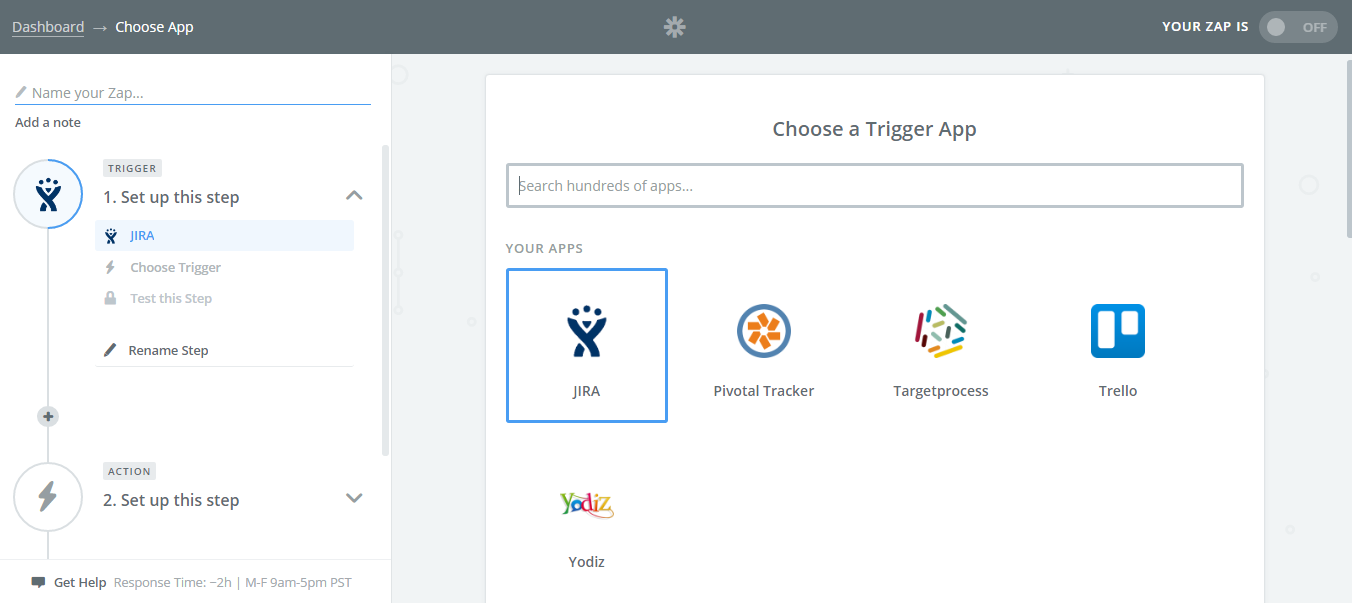
Step 2: Choose Trigger App
Select a Yodiz supported application. We are choosing Jira application as a Trigger in this case.
Step 3: Choose Trigger
Select an activity that will pull the Trigger. Follow the screenshot below:
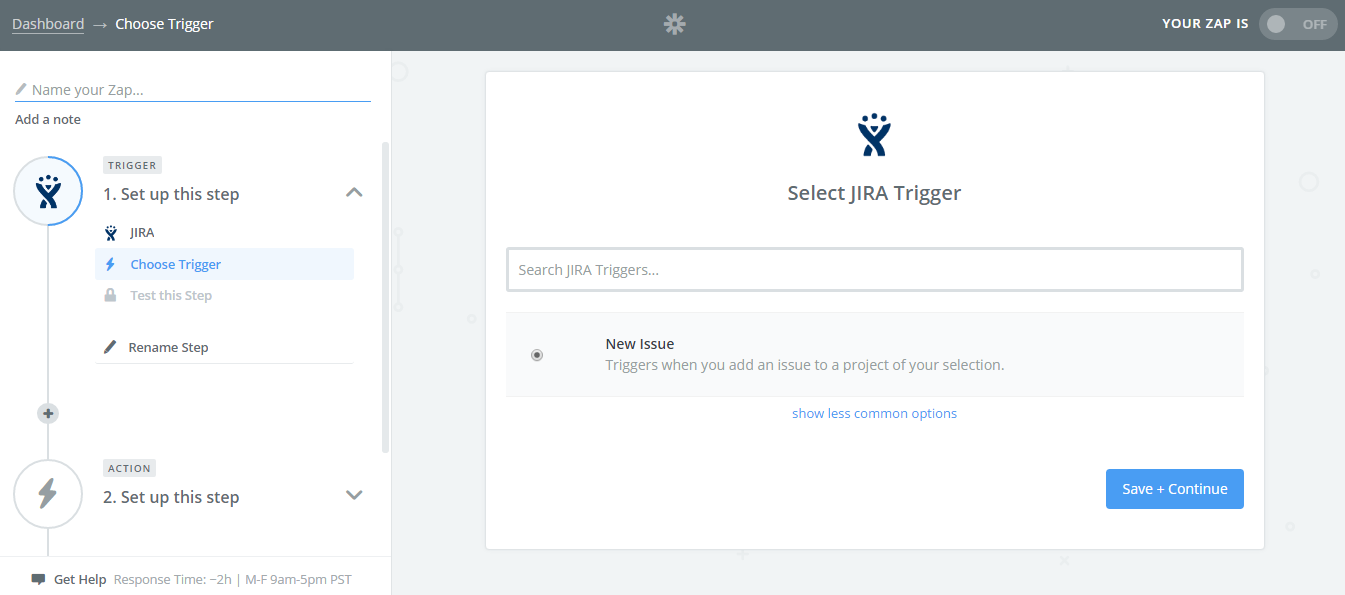 In this case, we have selected New Issue. Click on Save + Continue.
Step 4: Connect a New Account
Connect with your application. Here we connected with Jira account.
Base URL: URL for Jira account.
Username: Username associated with Jira account.
Password: Password for your Jira account.
Click on Yes, Continue.
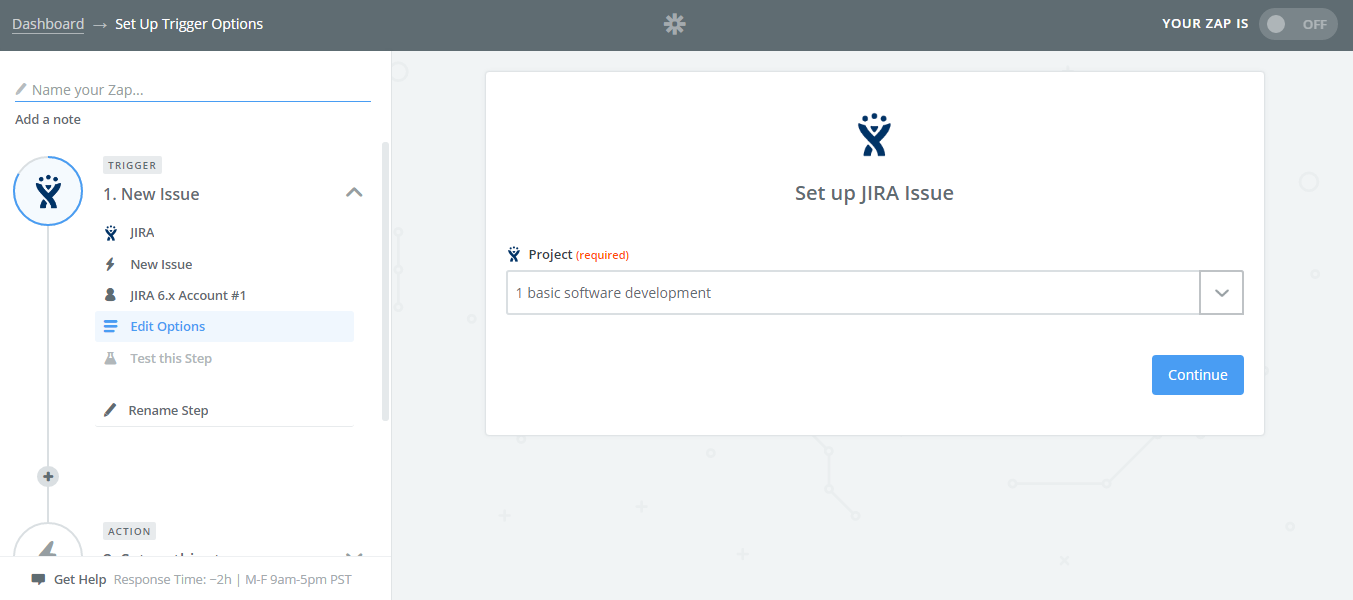
Step 5: Select the Project
From a list of project dropdown, select the desired project.
Click on Continue, following page will appear.
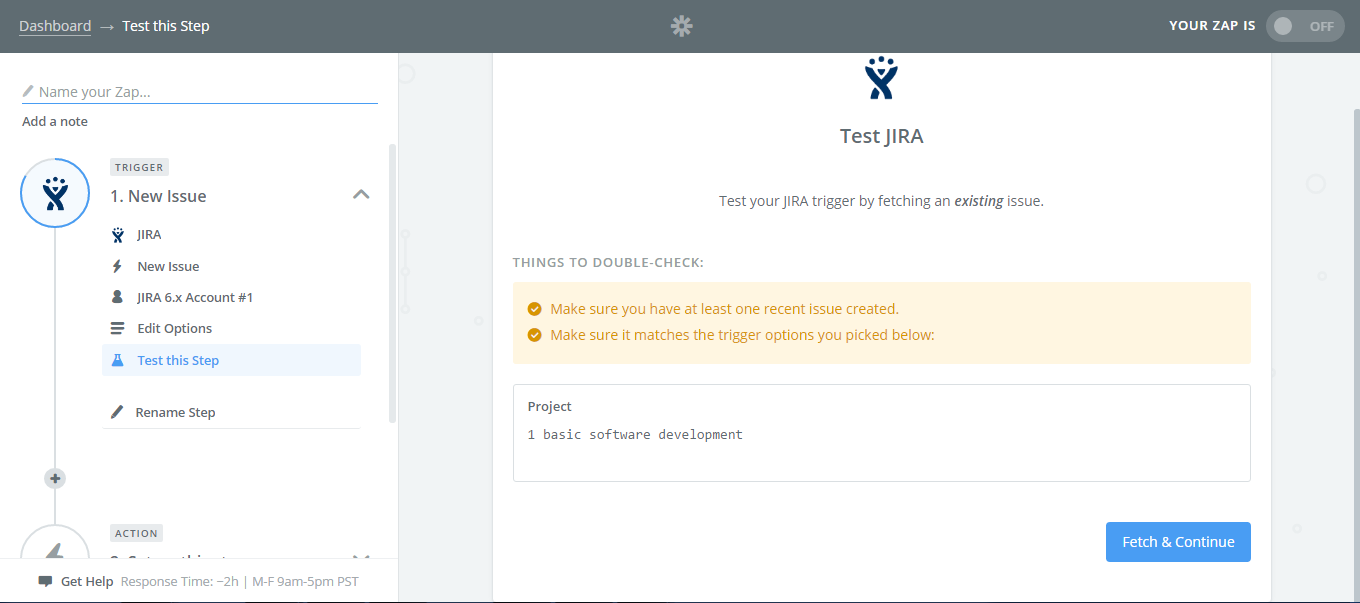 Double check your details and click on Fetch & Continue.
Following page will appear.
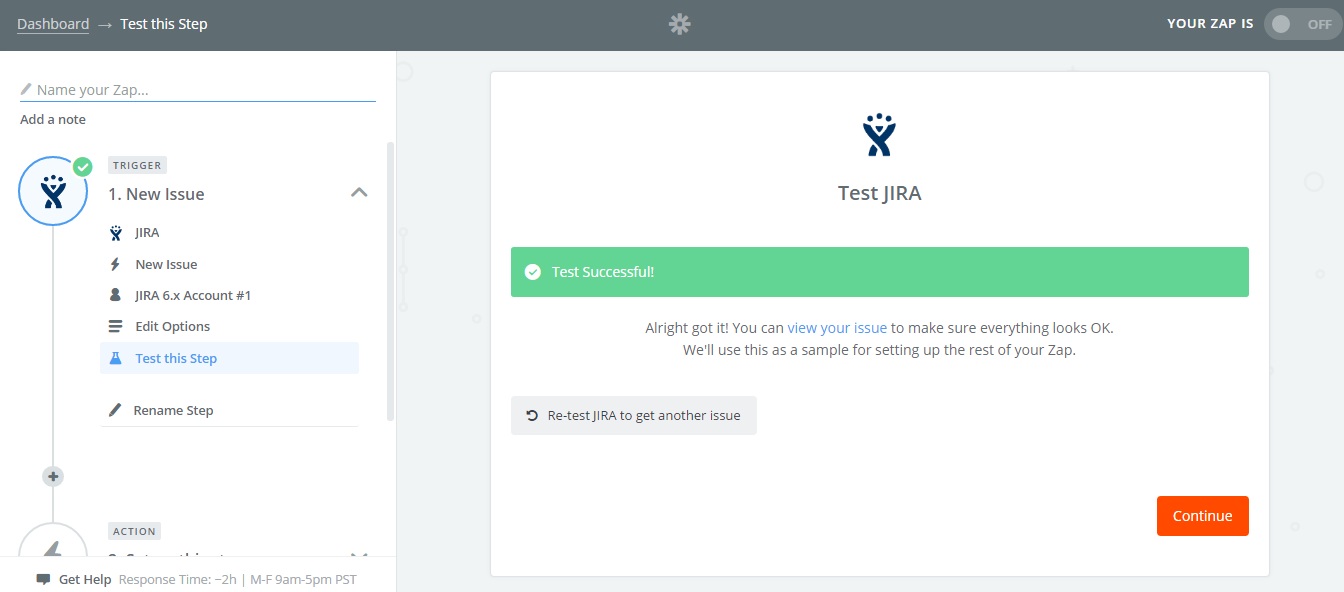 Click on Continue.
Step 6: Choose an Action App
Once you are done with Trigger setup, choose Action app. We are selecting Jira as Action app in this case.Click on Continue button, given at the end of current page.
Step 7: Choose Action
Choose an Action from the list. We have selected Create Issue in this case. Click on Continue.
Step 8: Connect to Yodiz
Username: Provide your Yodiz account username.
Password: Provide password associated with your Yodiz account.
API Key: Provide API key. If you can not find API key, follow this link: How to Generate Yodiz API Key
Click on Yes, Continue.
Step 9: Setup Yodiz Issue
Fill in the fields, Required fields are mandatory while optional fields can be left blank, depending upon your requirements.
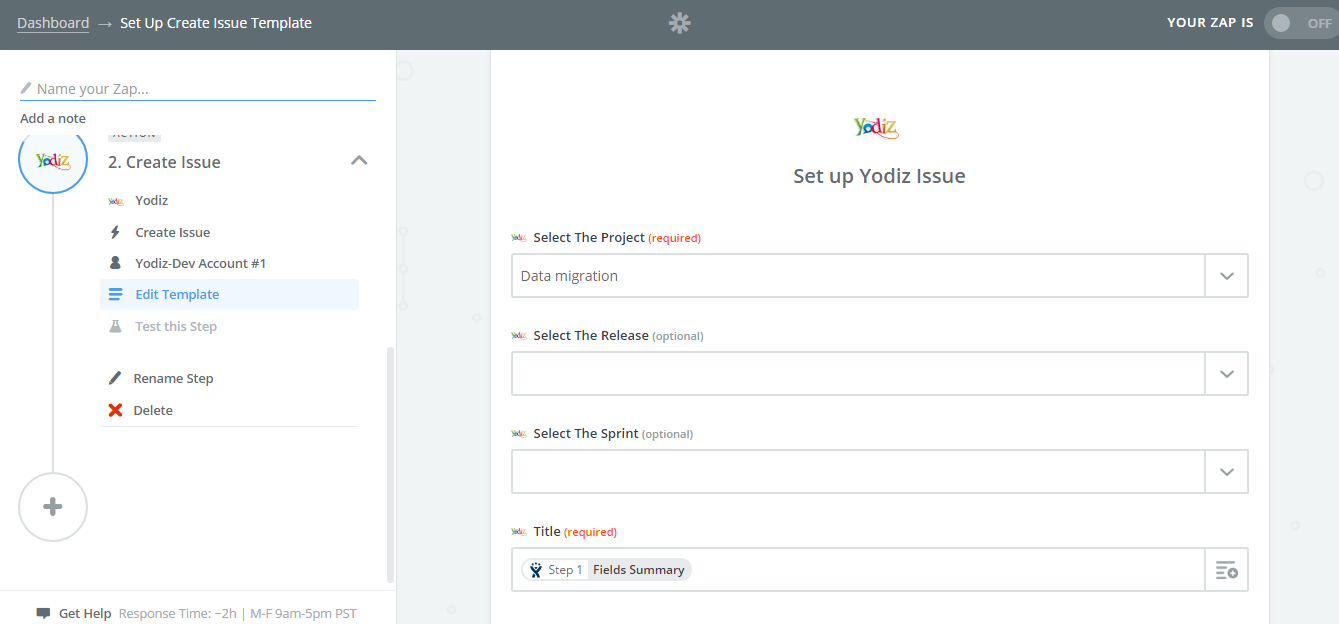
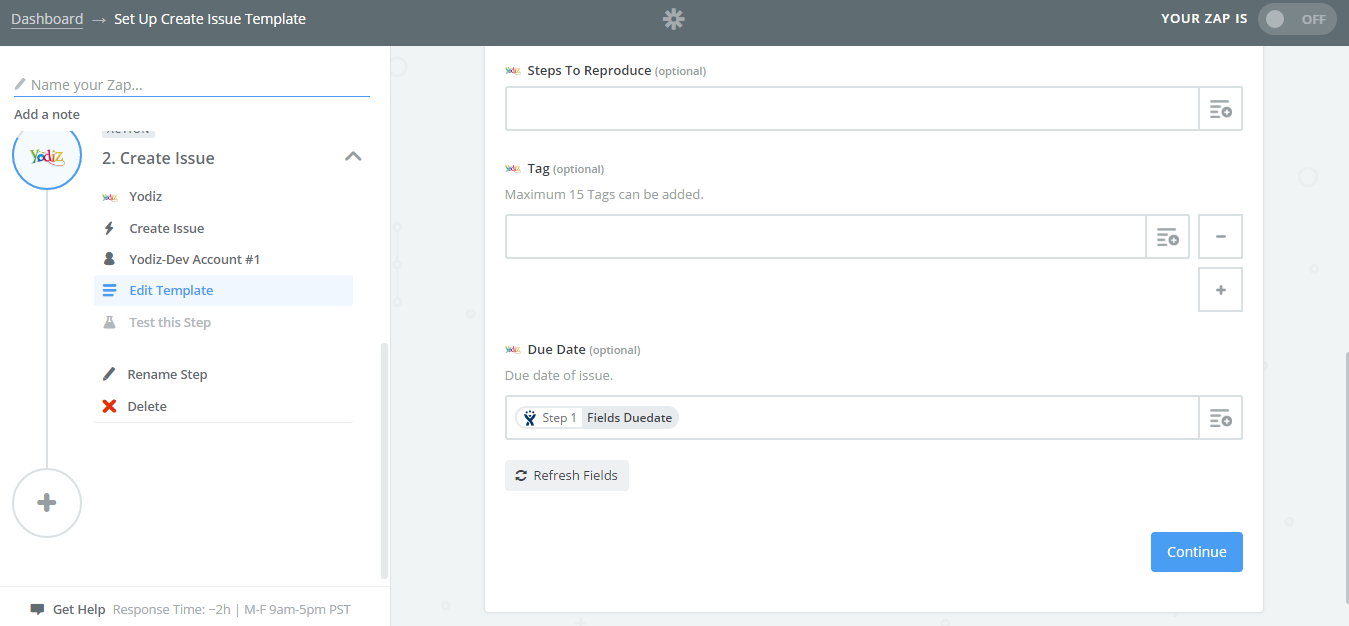
Once you have filled in all the details, click on Continue.
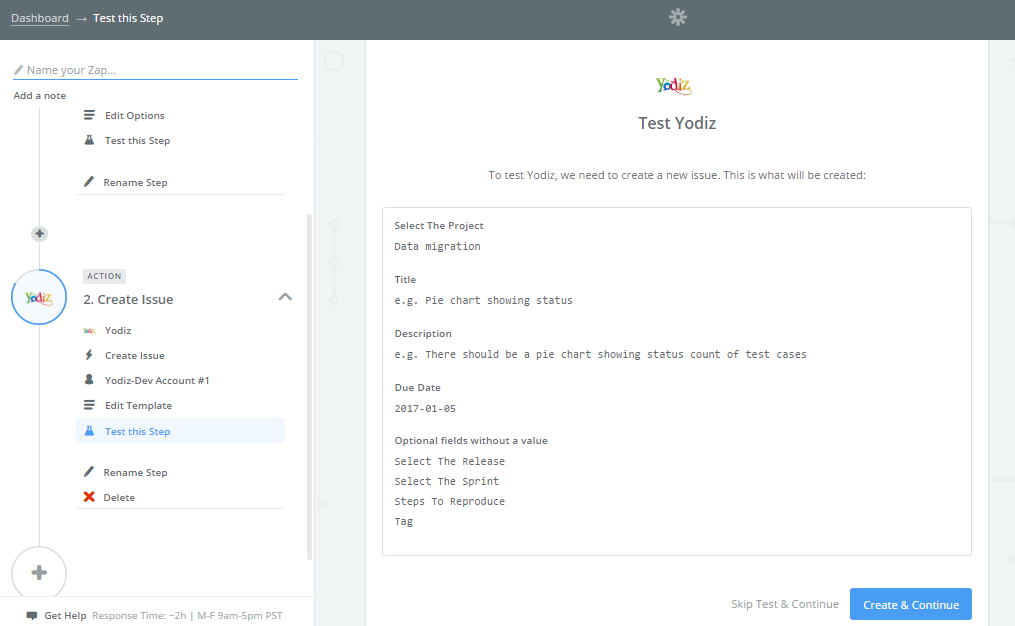
Verify your selections and click on Create & Continue.
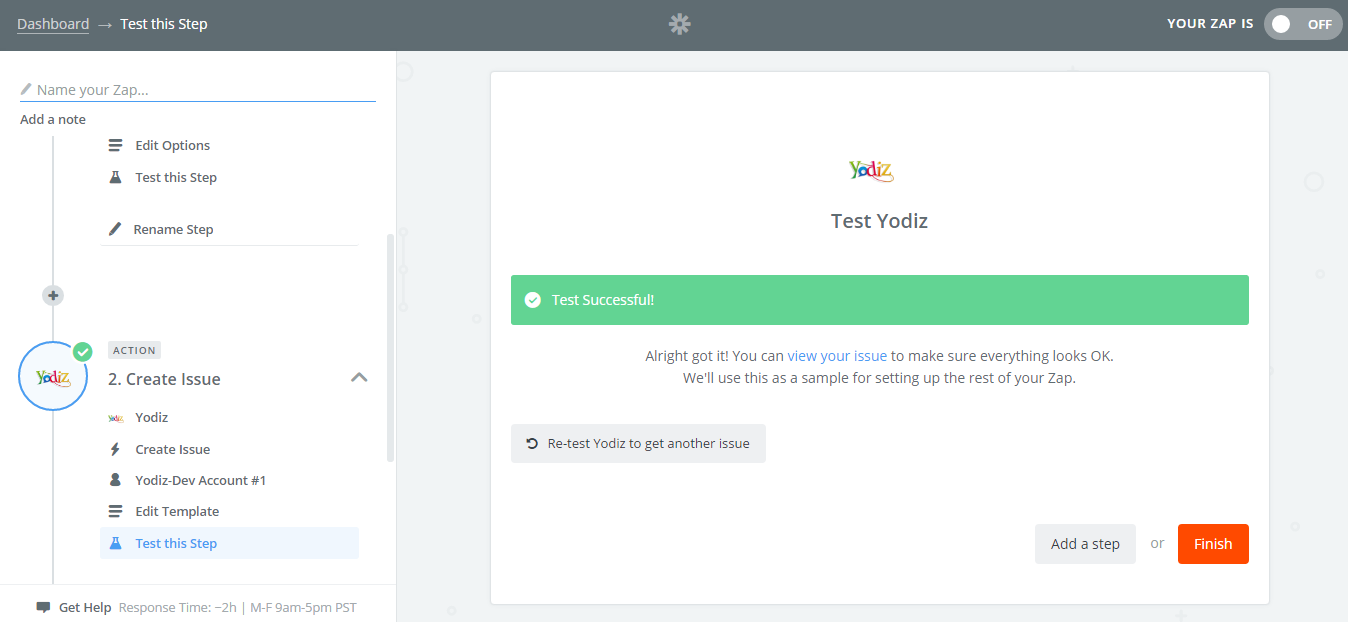
Click on Finish.
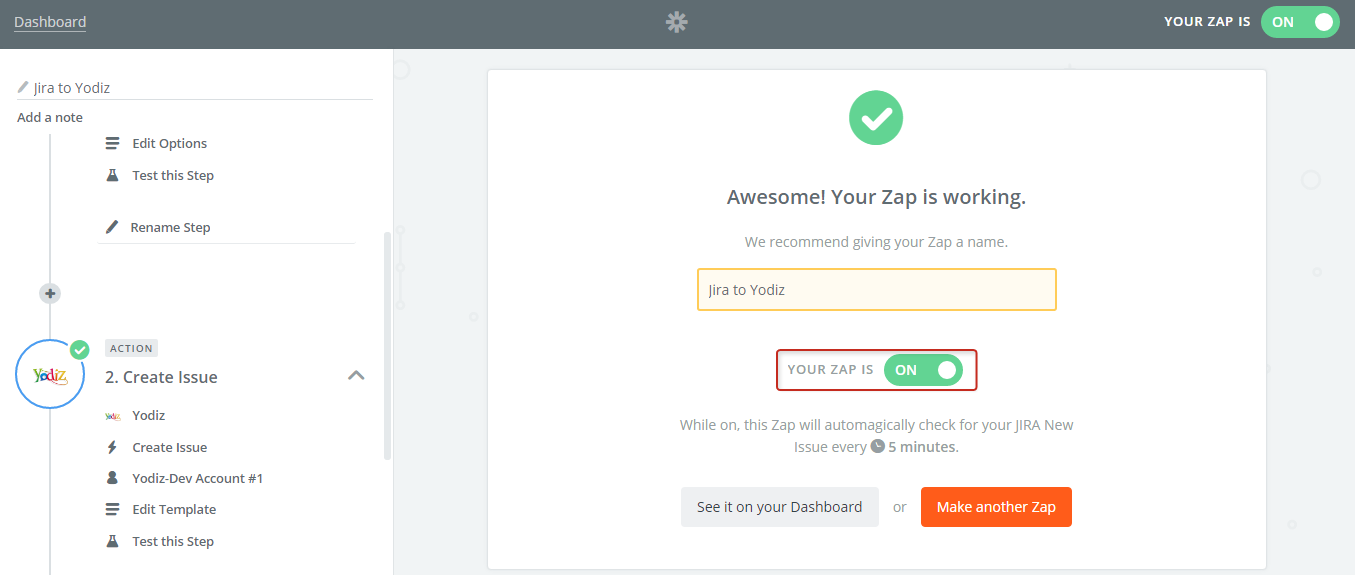 Turn ON your Zap to complete the workflow. You can find this Zap on Zapier dashboard.