Dependency tracking is an enhanced feature which helps to track the Items which are dependent on each other. Most teams need some way to manage dependencies between different items, e.g., a Release probably can not be delivered until a blocker Issue is resolved. Adding such association is a way to prioritize an item which should be completed before others.
You can associate an item with all supported work item types. Association is supported for Issues, Tasks, User Stories, Sprints, Releases, and Epics.
1. Dependency Types
There are 3 kinds of supported dependencies. Status Set scheme and dependencies are closely linked as you can not change status of Item to close category unless dependencies are resolved.
The three dependencies are:
- Blocked by
- Is Blocking
- Associates
Note: Check your project Status Set scheme to know status set details of your project.
i) Blocked By
Use this association if an item progress is dependent on another item completion.
For example: a User Story can not be accepted as Done due to an open Issue. System only forfeits the completion of dependent item until blocking item is not Done.
Note: You are can change Item status to New and In Progress category.
ii) Is Blocking
Use this association, if you know the source item that is blocking other item. In this case, other item progress is dependent on completion of the source item.
For example: A Task might be blocking progress of another User Story.
iii) Associates
This is just to simply show the relationship between two items. This association does not hinder other item progress as such. All associated items status can be changed freely.
This association is usually used when you want to follow the progress of such items which are not directly related to your items but it may help you in forecasting your development plan. This association can also be used to track progress of another team´s associated items.
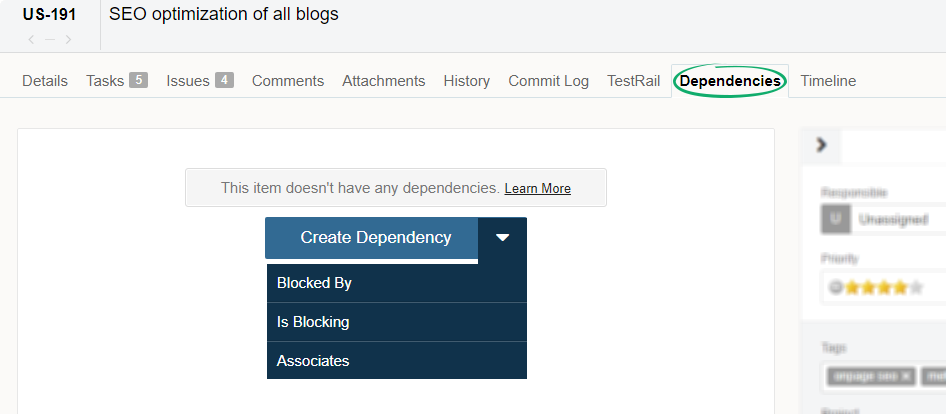
2. Create Dependency
In order to create a dependency for any item, open the item’s detail edit view and go to dependencies tab. Click on Create Dependency button, and choose the type of Dependency you want to create.
On the resulting screen, select the items you want to create a dependency for. You can search for items by using the search bar. Select the item, and click the Create Dependency button.
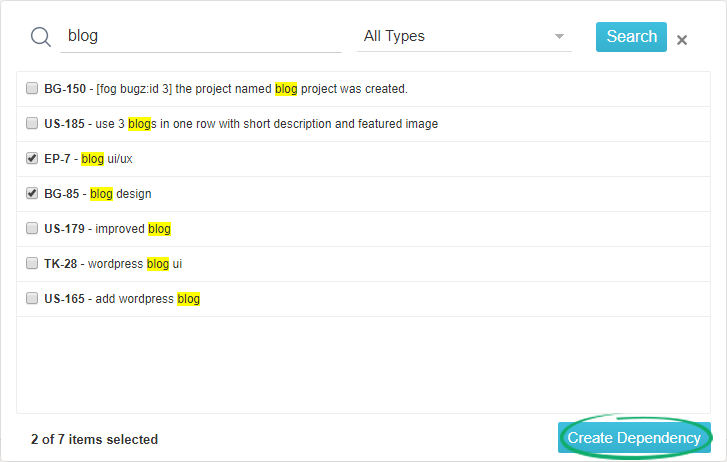
Tip: You can choose to narrow the search feature by selecting specific item types. This can be done by clicking the All Types drop down menu.
3. Tracking Dependencies
You can access all the dependencies created for all of your projects at single place. This dependency tracking is even more useful when multiple teams are working on related features and their progress is highly dependent on other team deliveries. Follow the navigation below to access Dependency Tracking.
Go to leftmost Navigation Menu ![]() > Dependency Tracking
> Dependency Tracking
Select “Projects” and Item Type, e.g., “Issues”, “User Stories” etc to view dependent items.
Please note that you can select multiple projects from the Projects list, however, you will only be able to select single “Item type” like “Issue” at a time.
Selecting the single project will show only items, those are associated with the same project. To look at dependencies with other project. You should select both project names in Project list dropdown.
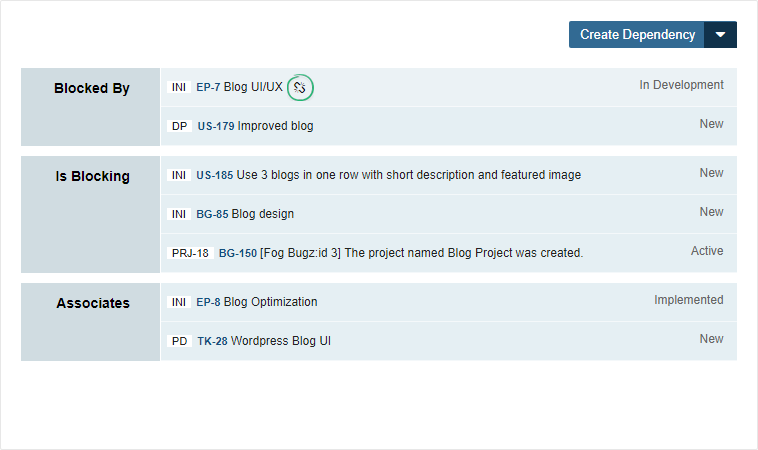
Association types are colored differently to distinguish them quickly. You can see associated item title and status at the same page.
4. Removing Dependencies
Open the item detail view and go to dependencies tab. Mouse over associated item details, Click on remove dependency icon. Confirm the change and save it.
Pingback: Yodiz Team Blog » Blog Archive » New features: Dependency Tracking, Interact via Email, Global To-Do and other enhacements()
Pingback: How to associate user story to issues | Agile Scrum Tool, Issue Tracker, Kanban Task Board, Project Management, Epics Management, Bug Tracking – Yodiz()