Plan, schedule, and monitor your release contents at one place. Release board is a higher level view of User Stories and Issues progress, independent of sprints. It provides a great way to monitor the progress of each User Story and all Issues of the Release. User Stories on the board may or may not belong to a Sprint.
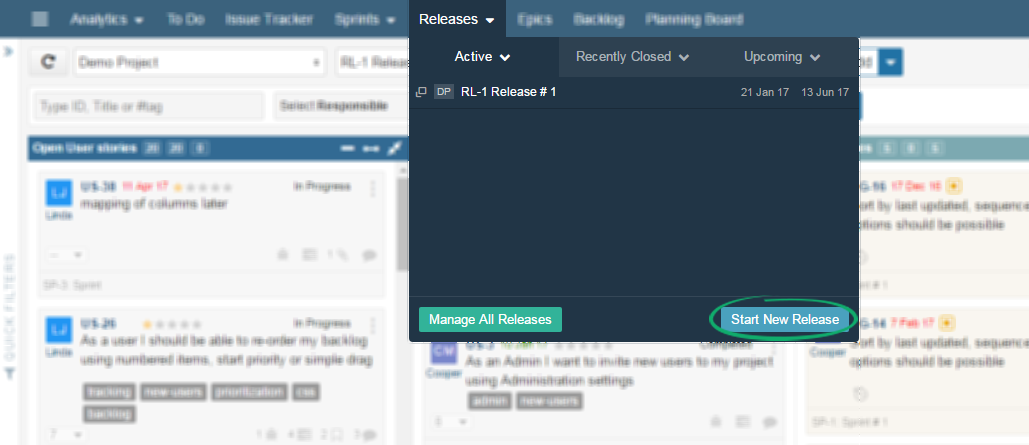
1. Start New Release
Just click on the Release drop-down from the navigation menu and select “Start New Release”.
Fill in start and end date of new release with other details and click on Save.
Note:
- Check Release Board Layout by clicking on Board Layout field. This is to make sure that layout aligns with your project needs.
- Select Release Status from Status dropdown. This indicates your overall release stage.
2. Plan Release Contents
Once you start to plan a Release, the goal is to get piece of work that end user can start using it after launch. It does not matter that if listed work is part of Backlog or part of multiple Sprints. Keypoint in release planning is, list of contents that we need to deliver and team velocity for successful delivery. Stay on same Release Board and you can add Items directly from Backlog or a Sprint.
2.1 Add Backlog User Stories
You can add User Stories from Backlog directly in to Release Board from the right navigation panel. There is a Backlog Tab provided in the panel as well as use a filter button, which helps in finding the desired Item quickly.
Note: Backlog shown in this panel shows only User Stories. You can add independent Issues in Release, by using Planning Board.
2.2 Add All Sprint Contents
You can add Items from Sprint directly in to Release Board from the right navigation panel. There is a Sprint Tab provided in the panel as well as “Associate Sprints” dropdown, which helps in finding the desired Sprint quickly.
Associating a Sprint will add all contents of that Sprint in that Release. Association will link only selected Sprint contents to the Release. If you add an Item in the Sprint later and want to add it in the same Release. Use “Associate remaining items” option, by selecting Release Board, Right Navigation menu > Sprint, find the Sprint that you added Items into, click on the ellipses icon provided at the left end of that Sprint and click “Associate Remaining Items” in order to associate the newly added Items in the Sprint.
2.3 Add Issue and User Story
You can create new Issue and add an existing Issue by using ![]() drop down. You can also add User Stories using same drop down.
drop down. You can also add User Stories using same drop down.
3. Schedule Release Contents with Calendar
It is quite efficient feature of Yodiz when it comes to scheduling work with minimum effort and maximum visibility. With weekly the and monthly view of calendar you can schedule work with ease and according to your requirement. You can add items directly from Backlog and Sprints and schedule it in your Release. Learn more about How to Use Calendar.
4. Assess Release with One Click
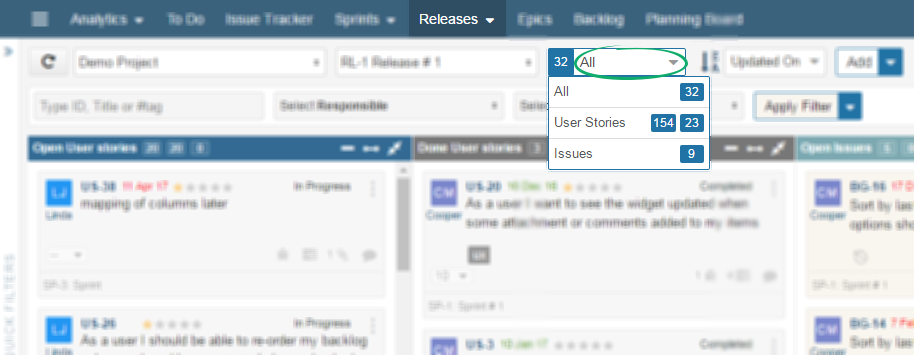
Comprehend your work by looking at: what is achieved, what work is ongoing and what is coming up. To do so, Release Board provides you few built-in filters. Use Drop down under main navigation, to see work items according to your selection.
There are 3 main groupings of Items on Release Board.
- All: User Stories and Issues in the current Release will show up with this option.
- User Stories: Only the User Stories on Board will display if you select the User Story grouping.
The counter on the right shows you total number of User Stories. You can also see the sum of estimates in the User Story bar, as there are two counters there, the right one shows number of User Stories and left one shows sum of estimates.
- Issues: Only Issues of the release will show up if you select this option.
5. Release Board Visualization & Customization
There are multiple board visualization and customization options, details of these are given below.
- Zoom functionality
 : You can zoom in and out on Release Board.
 - Expand/Collapse
 : You can expand and collapse columns.
 - Calendar
 : Calendar view provides easy scheduling of Items along with more visibility. Learn more about How to Use Calendar?
 - Swimlanes
 : Swimlanes are also provided on Release Board, Swimlanes make it much easier to sort Items, Learn more about Swimlanes
 - Customize Board Columns: You can customize your board columns from this option. Learn more about how to use Board Layout Editor.
6. Release Board Functionalities
Release Board offers multiple functionalities, let’s discuss in detail.
6.1 Drag & Drop Items
You can Drag & Drop Items on the Release Board however Issues can only be dropped in Issues Column and User Stories in the respective column.
Note: Drag and Drop Items within the same panel only works when items are ordered in Sequence order. Use built-in Order By filter bar,and set value as “Sequence”.
6.2 Search & Filters
You can search and filter your entire Release Board. The most common filter used in Release Board is Order By filter. It is placed on the top of Filter bar. You can use built-in Order By filter bar, to sort Release items by:
- Updated On
- Created On
- Due Date
- Sequence
Search can be performed on many criterias, you can search by Item Responsible, Creator, ID, Tag or Title. More filters option is also available on the top right side of the page.
Note: you can learn more about how to use Search and Filters functionality.
6.3 Right Navigation Panel
The Right Navigation Panel on the Release Board offers multiple functionalities.
- Analytics
- Activities
- Sprints
- Settings
- Backlog
It shows Analytics regarding currently selected Release. Burndown chart and statistics summary helps you get an overview of Release progress. Complete Analysis of the release is also accessible here.
The activities happening in a current Release are logged in the activities Tab. You can filter these activities using Filter option. Use filter to search for changes made for one user story or by one individual.
It shows the list of associated Sprints in a Release, you can even associate other Sprints in this section. Associating a sprint with release would take all contents of that Sprint in selected release.
This tab allows you to customize your Release board, manage Release board and export Release data in different popular formats. You can select fields, which you want to export.
The Backlog Tab allows to directly add User Stories to the current Release. You can add only User Stories using this tab. Adding independent Issues is not supported from this tab.
7. Release Charts & Graphs
You can access Release associated Charts and Graphs through this navigation.
Following is the list of Charts and Graphs related to Release.