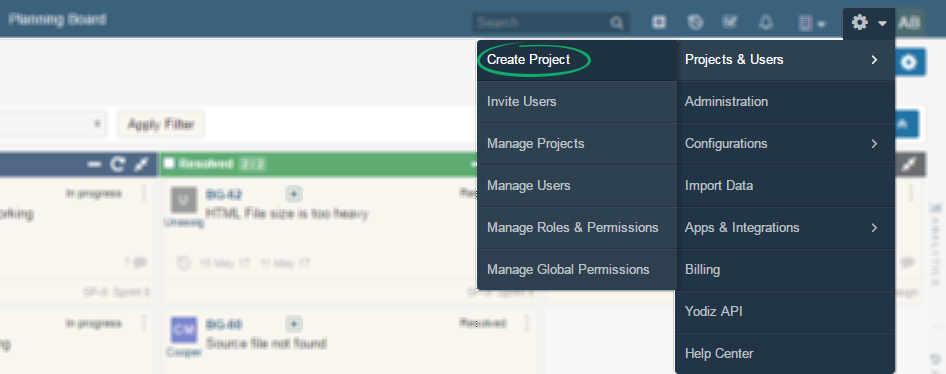
A project is placeholder to keep your work together. To create a new project, you may need Admin rights. Steps to create project are:
- Go to the Settings Icon
 > Projects & Users > Create Project
- The next screen is where you enter basic details for your project
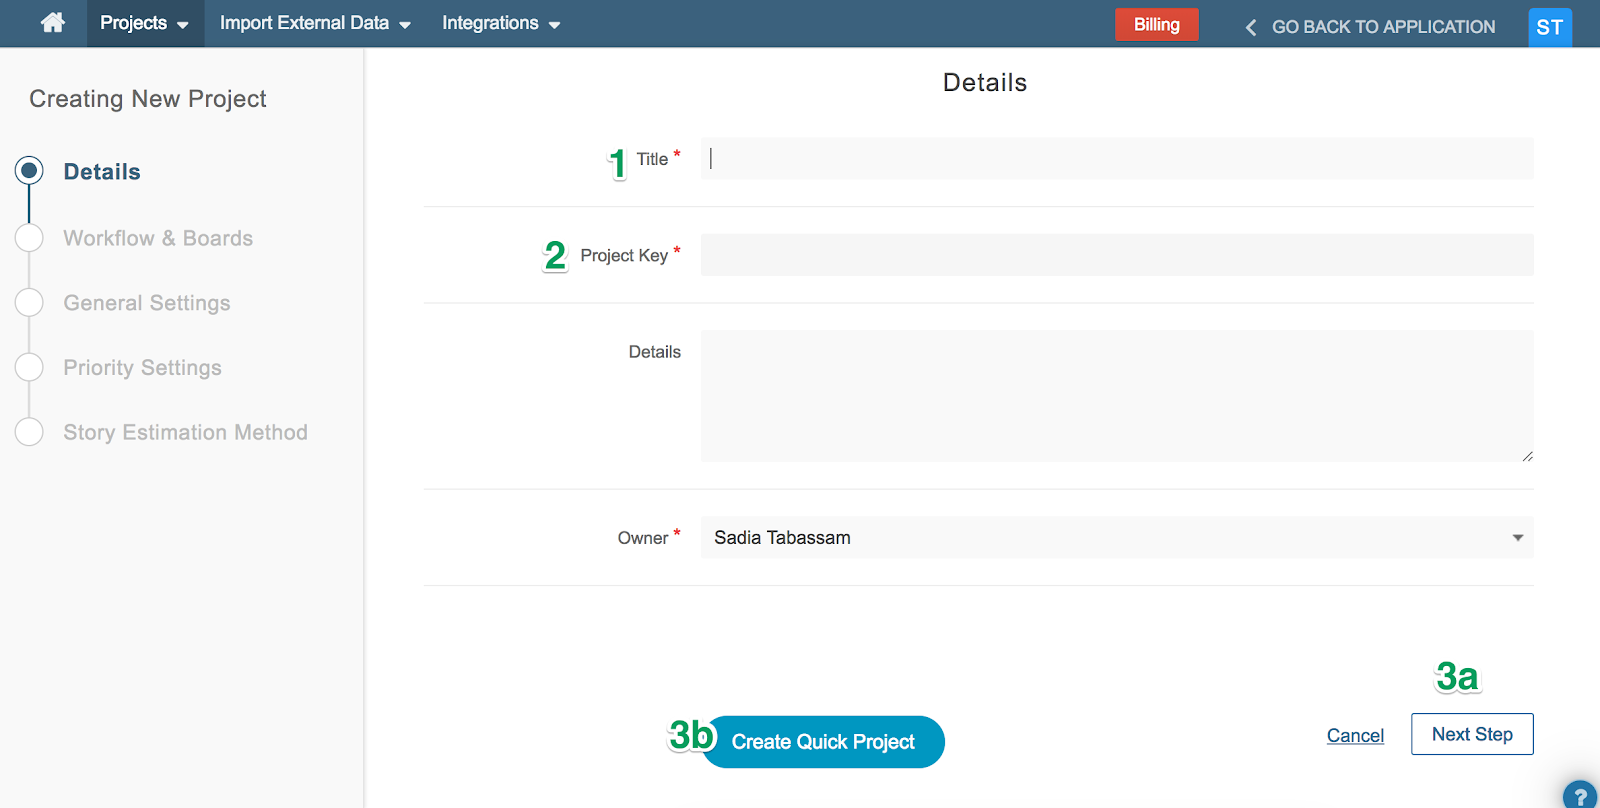
Check Field Names and their Description, for details.
Title – Enter the caption for your project. Title is used whenever your project is referred in Yodiz. Use a title that is clear enough for your project users and teams to understand its purpose better.
Project Key – Yodiz will automatically generate a short project name. However, if you wish to designate a short project name yourself, you can do so. On certain views like To-Do and Reports, where data is shown from multiple projects this key helps users to identify the contents and their relative projects. External users also need this key, if they want to create work items in Yodiz using
Details – A free text field to enter the details of your project like Project goals and purpose etc.
Owner – Owner of the project, by default is the creator of that project. Any user can be the owner of a project. Being owner of a project, does not impact user roles.
Tip: To create peject in one click, select CreateQuick Project, that will keep default values for item workflow, board and estimation settings. You can still change these settings later.
- Click “Next Step” to set
- default workflow and
- board layout settings. Multiple board types are available for each type of board.
- Click “Next Step” to set general project settings including , default sprint duration and
- Auto Update User Story Status.

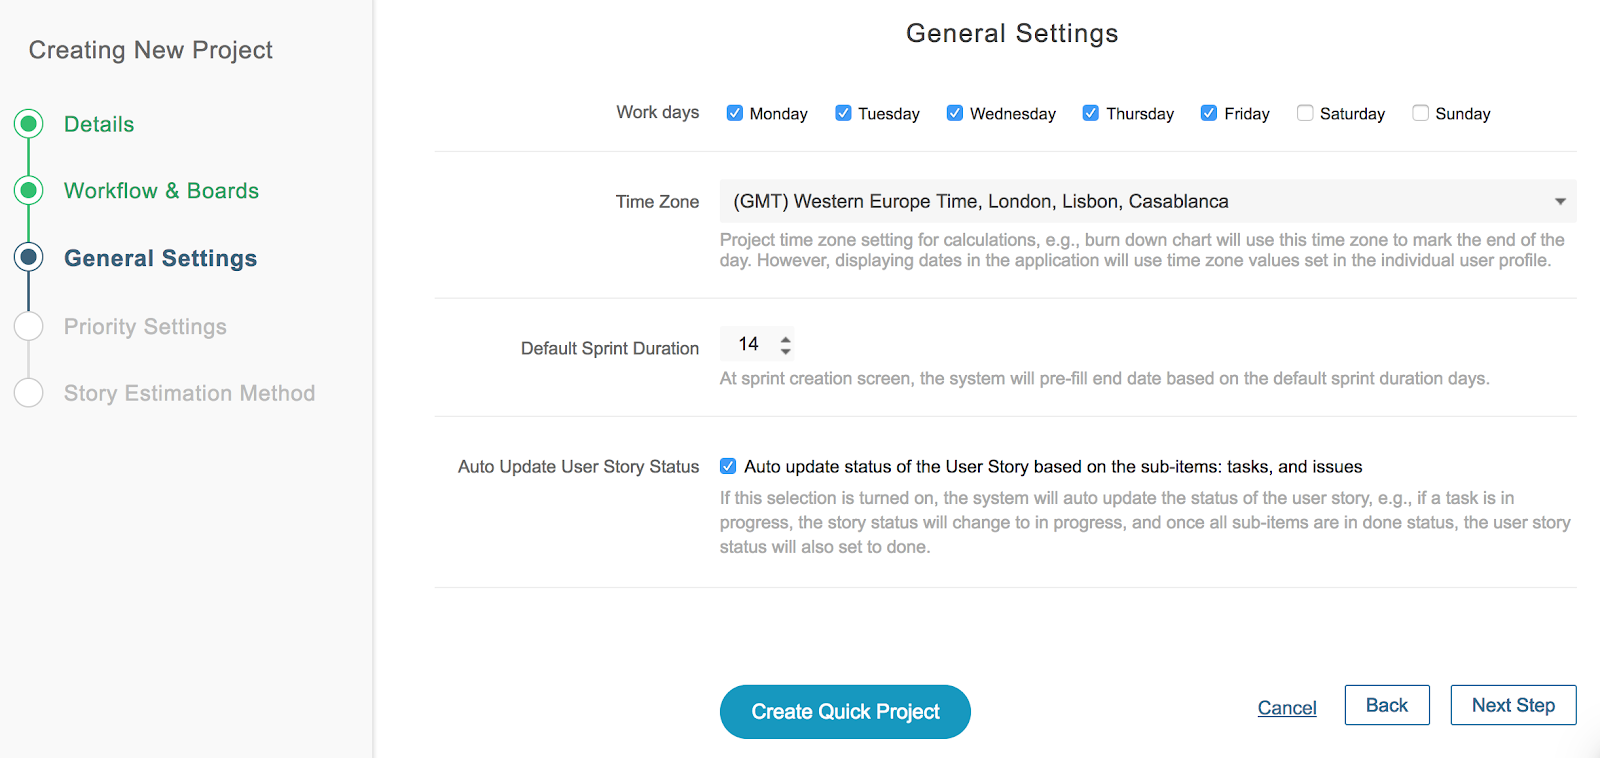
Work Days – Select the work days that are applicable in your country. Work days are used for calculations in Sprint Burn down chart and Resources weekly hours.
Time Zone – setting Project
time zone is important while team is located at different timezones. It impacts in effort estimation and graphs calculations.
Default Sprint Duration – Select number of days for an autmatic selection of end date of a Sprint while creating a new sprint.
Auto Update User Story Status – Marking this option will make User Story associated items dependant on User Story status. Whenever User story status is changed to Done, all its sub items will be automatically completed or closed.
- Click “Next Step” to set Priority Settings
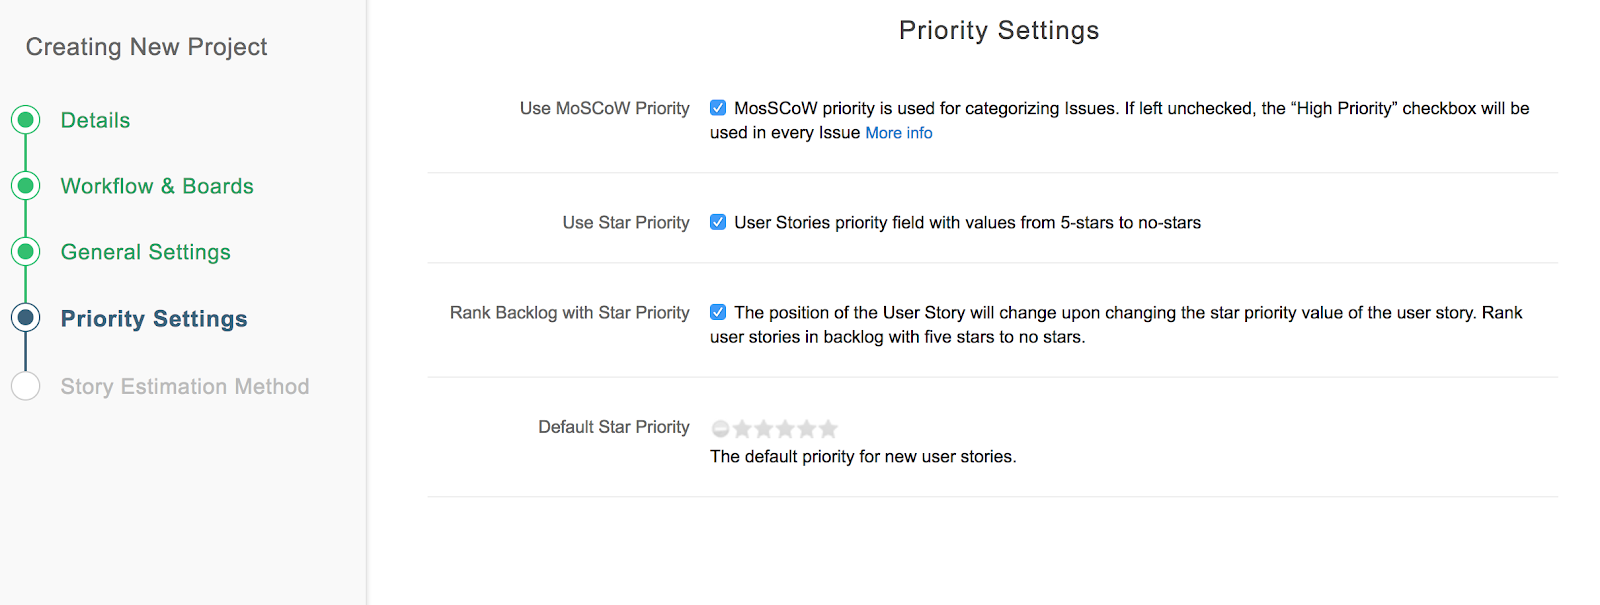
Use MoSCoW priority for Issues – One way to prioritize issues. Moscow Prorities are like “Must Fix”, “Should Fix”. If you keep MoSCoW priority unchecked, there will be single field “High Priority” as true or false for Project Issues. Learn more about
Use Star Priority – Check this option if you want to use Star priority in addition to number priority for User Stories. Both priority settings are used in such case.
Rank Backlog with Star Priority – Use this option, if you want to autochange number priority by changing star priority of an user story. It is easy to handle backlog, if you enable this option.
Default Star Priority – Set default priority stars for every newly created User Story so, you do not have to change it manually every time. By default, it is set to: no priority.
- Select User Story Estimation method and type
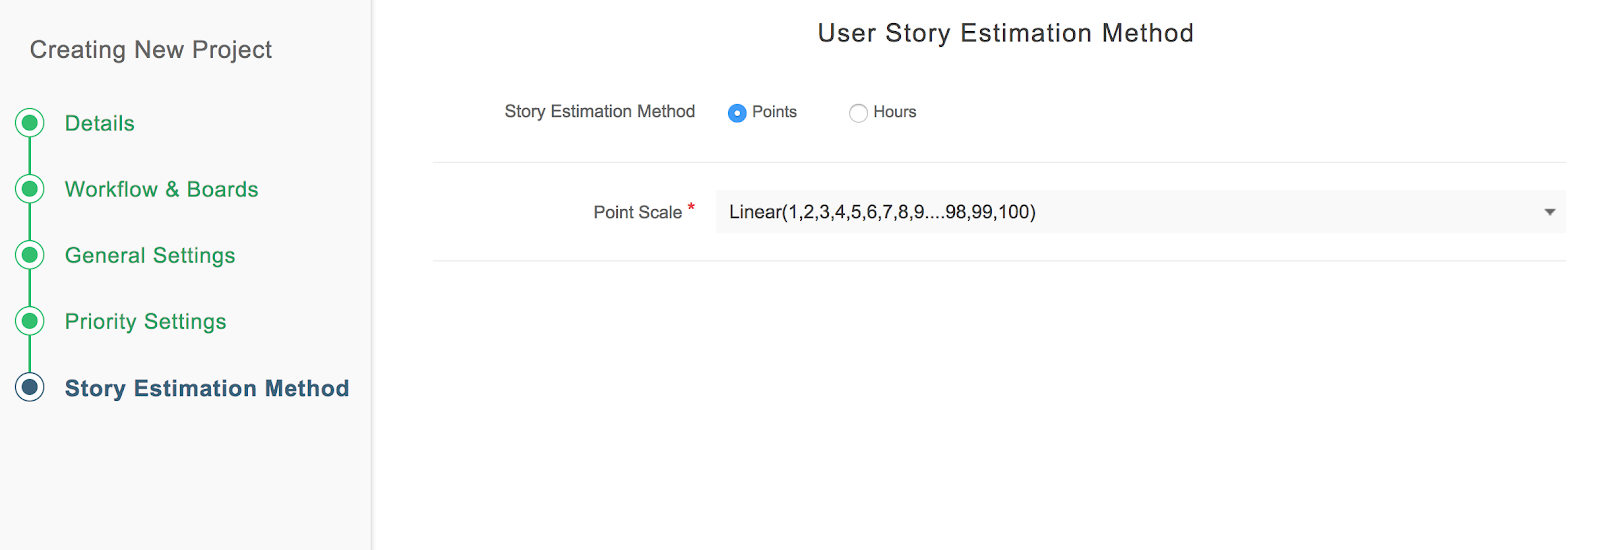
Estimation Method – Choose User Story estimation method, Yodiz supports both Points and Hours.
Point Scale – If you select “Points”, choose one from a drop down that appears with 4 options:
- Linear (0, 1, 2, 3, 4, 5)
- Fibonacci (0, 1, 2, 3, 5, 8)
- Scale-100 (0, 0.5, 1, 2, 3, 5, 8, 13, 20, 40, 100)
- T-Shirt size (XS, S, M, L, XL, XXL)
- Click Save to create this new project.
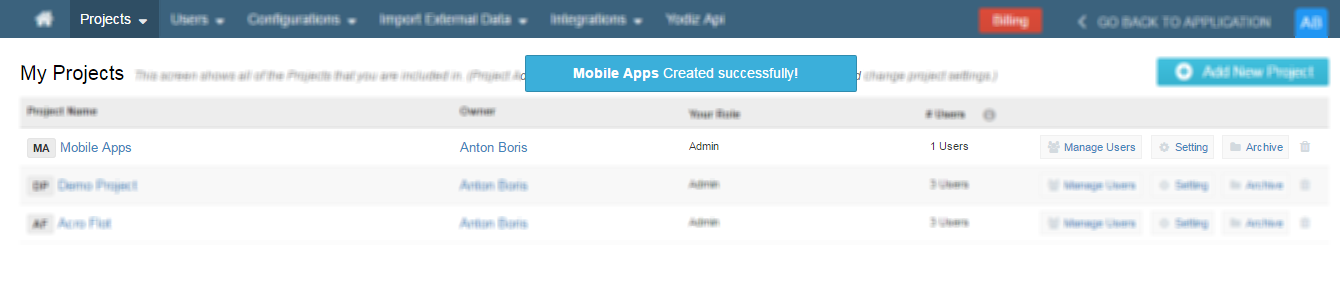
- A confirmation message will appear in order to notify you about the successful creation of project.
- Your new project is in this My Projects list now. Add project users or go back to Application to create work items.